template provided from Template
Download these sample files from Apress.
This chapter provided the big picture of what you’re going to accomplish in the first part of this book. I’m eager to get started and I hope you are too! Let’s begin with an introduction to the AWS Free Tier Account and show you how to get started using Amazon Web Services.
For a current list of what is covered within the free tier usage terms, go to Free.
From this page, click the “Sign in to the Console” button and that will bring you to the login page (see Figure 2-1).
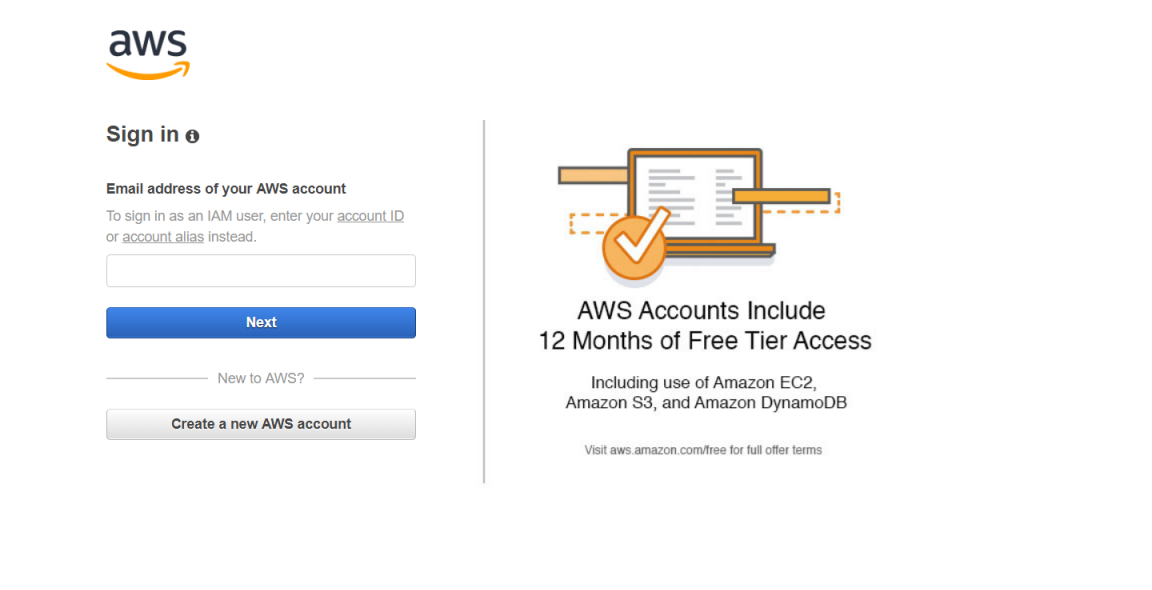
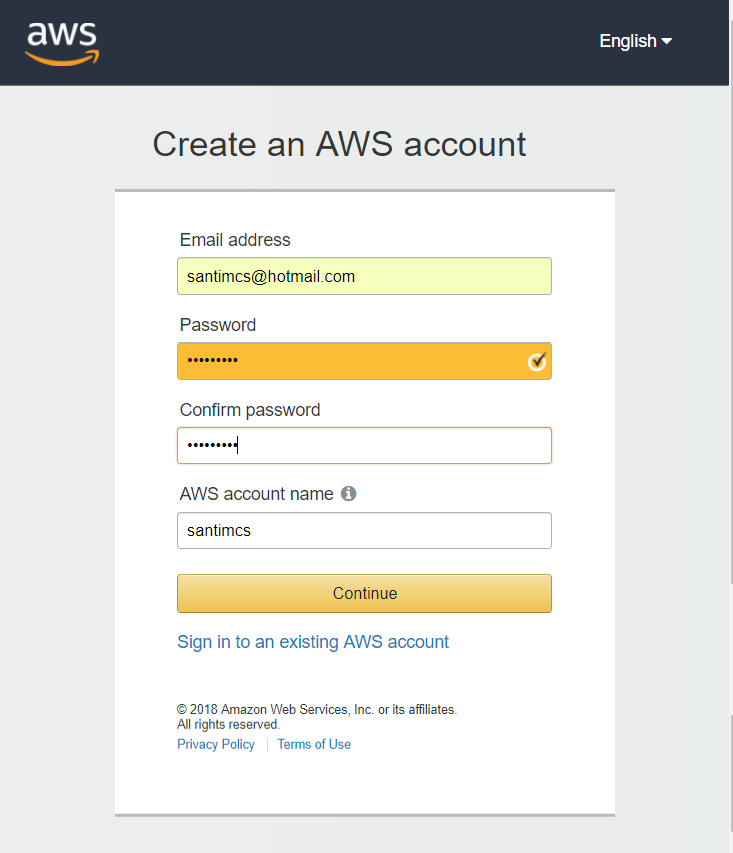
From here you can log into your account if you already have one, or you can choose the “Create a new AWS account” button. Enter "Create an AWS account" in Figure 2-2.
Then enter "Contact Information" with following data:

Then enter "Payment Information" with following data:

Then enter "Phone Verification" with following data:

After that there will be an automated phone call asking you to enter verification code that appear on screen to telephone keypad. If everything goes well, the following figure will appear on screen.
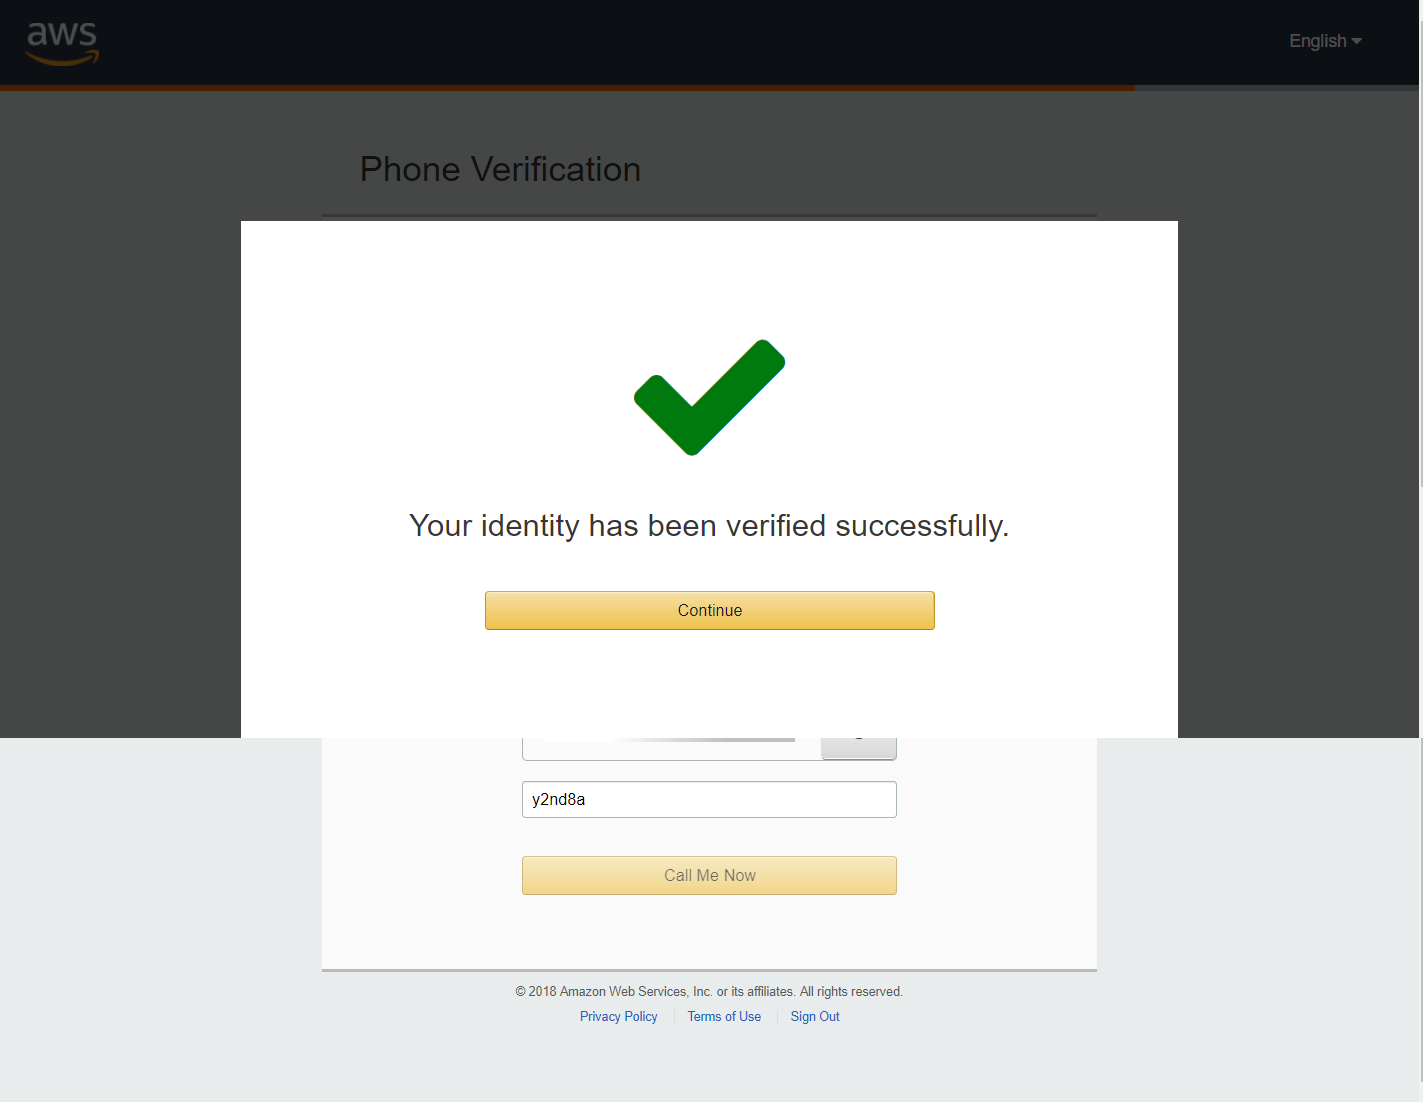
After that the following screen will appear.
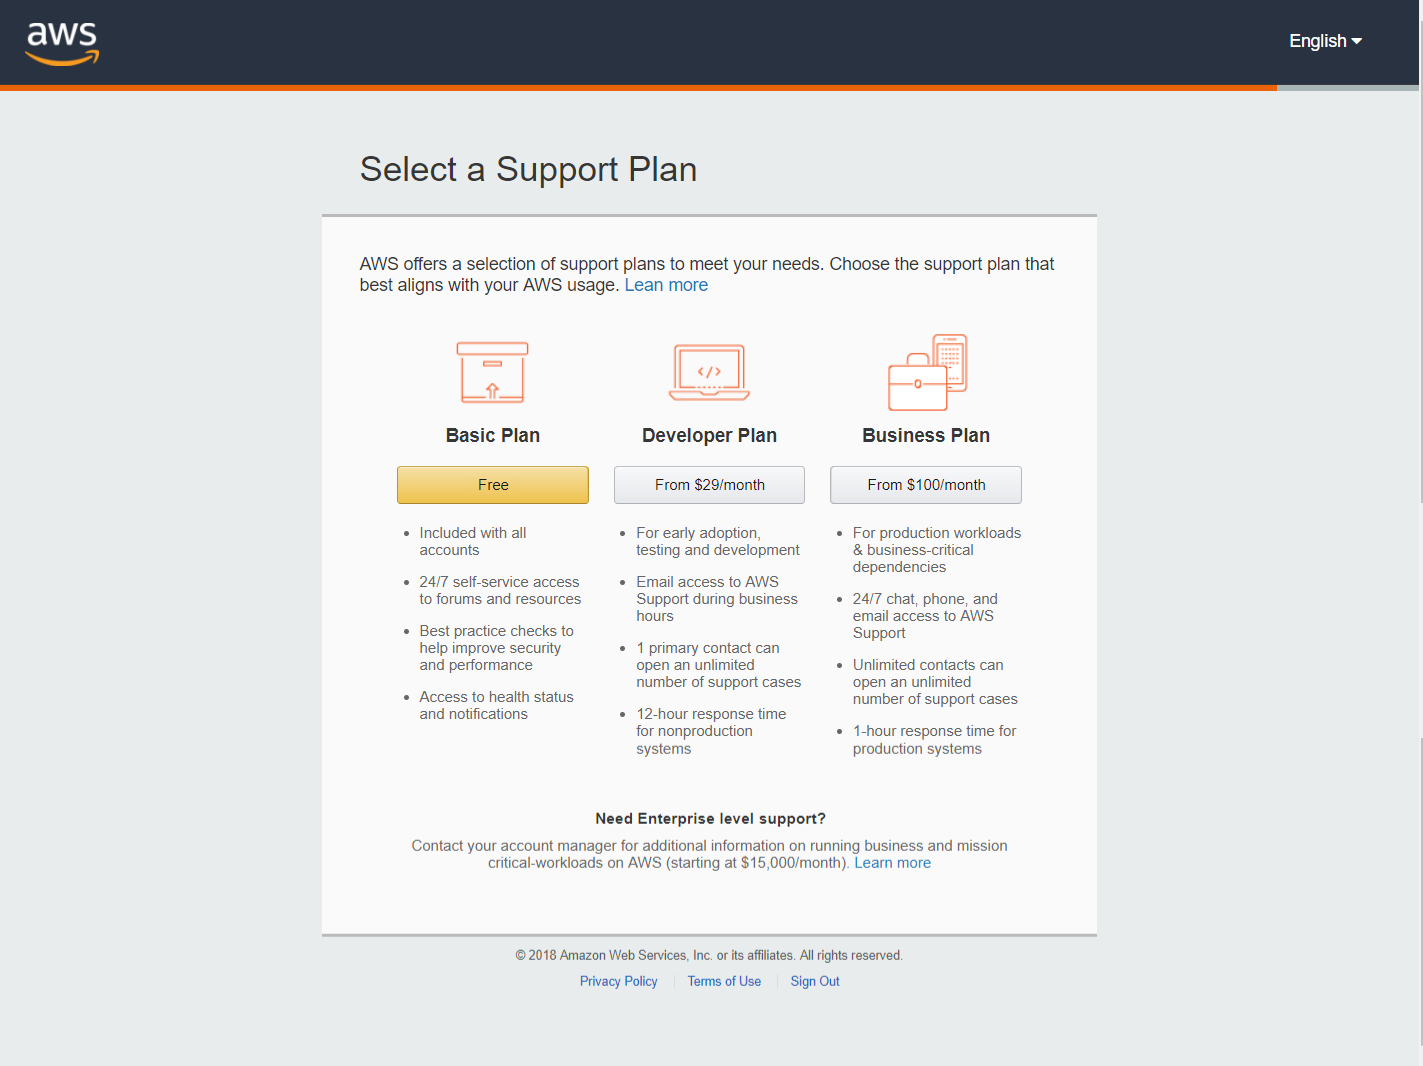
After select default plan, the following screen will appear.
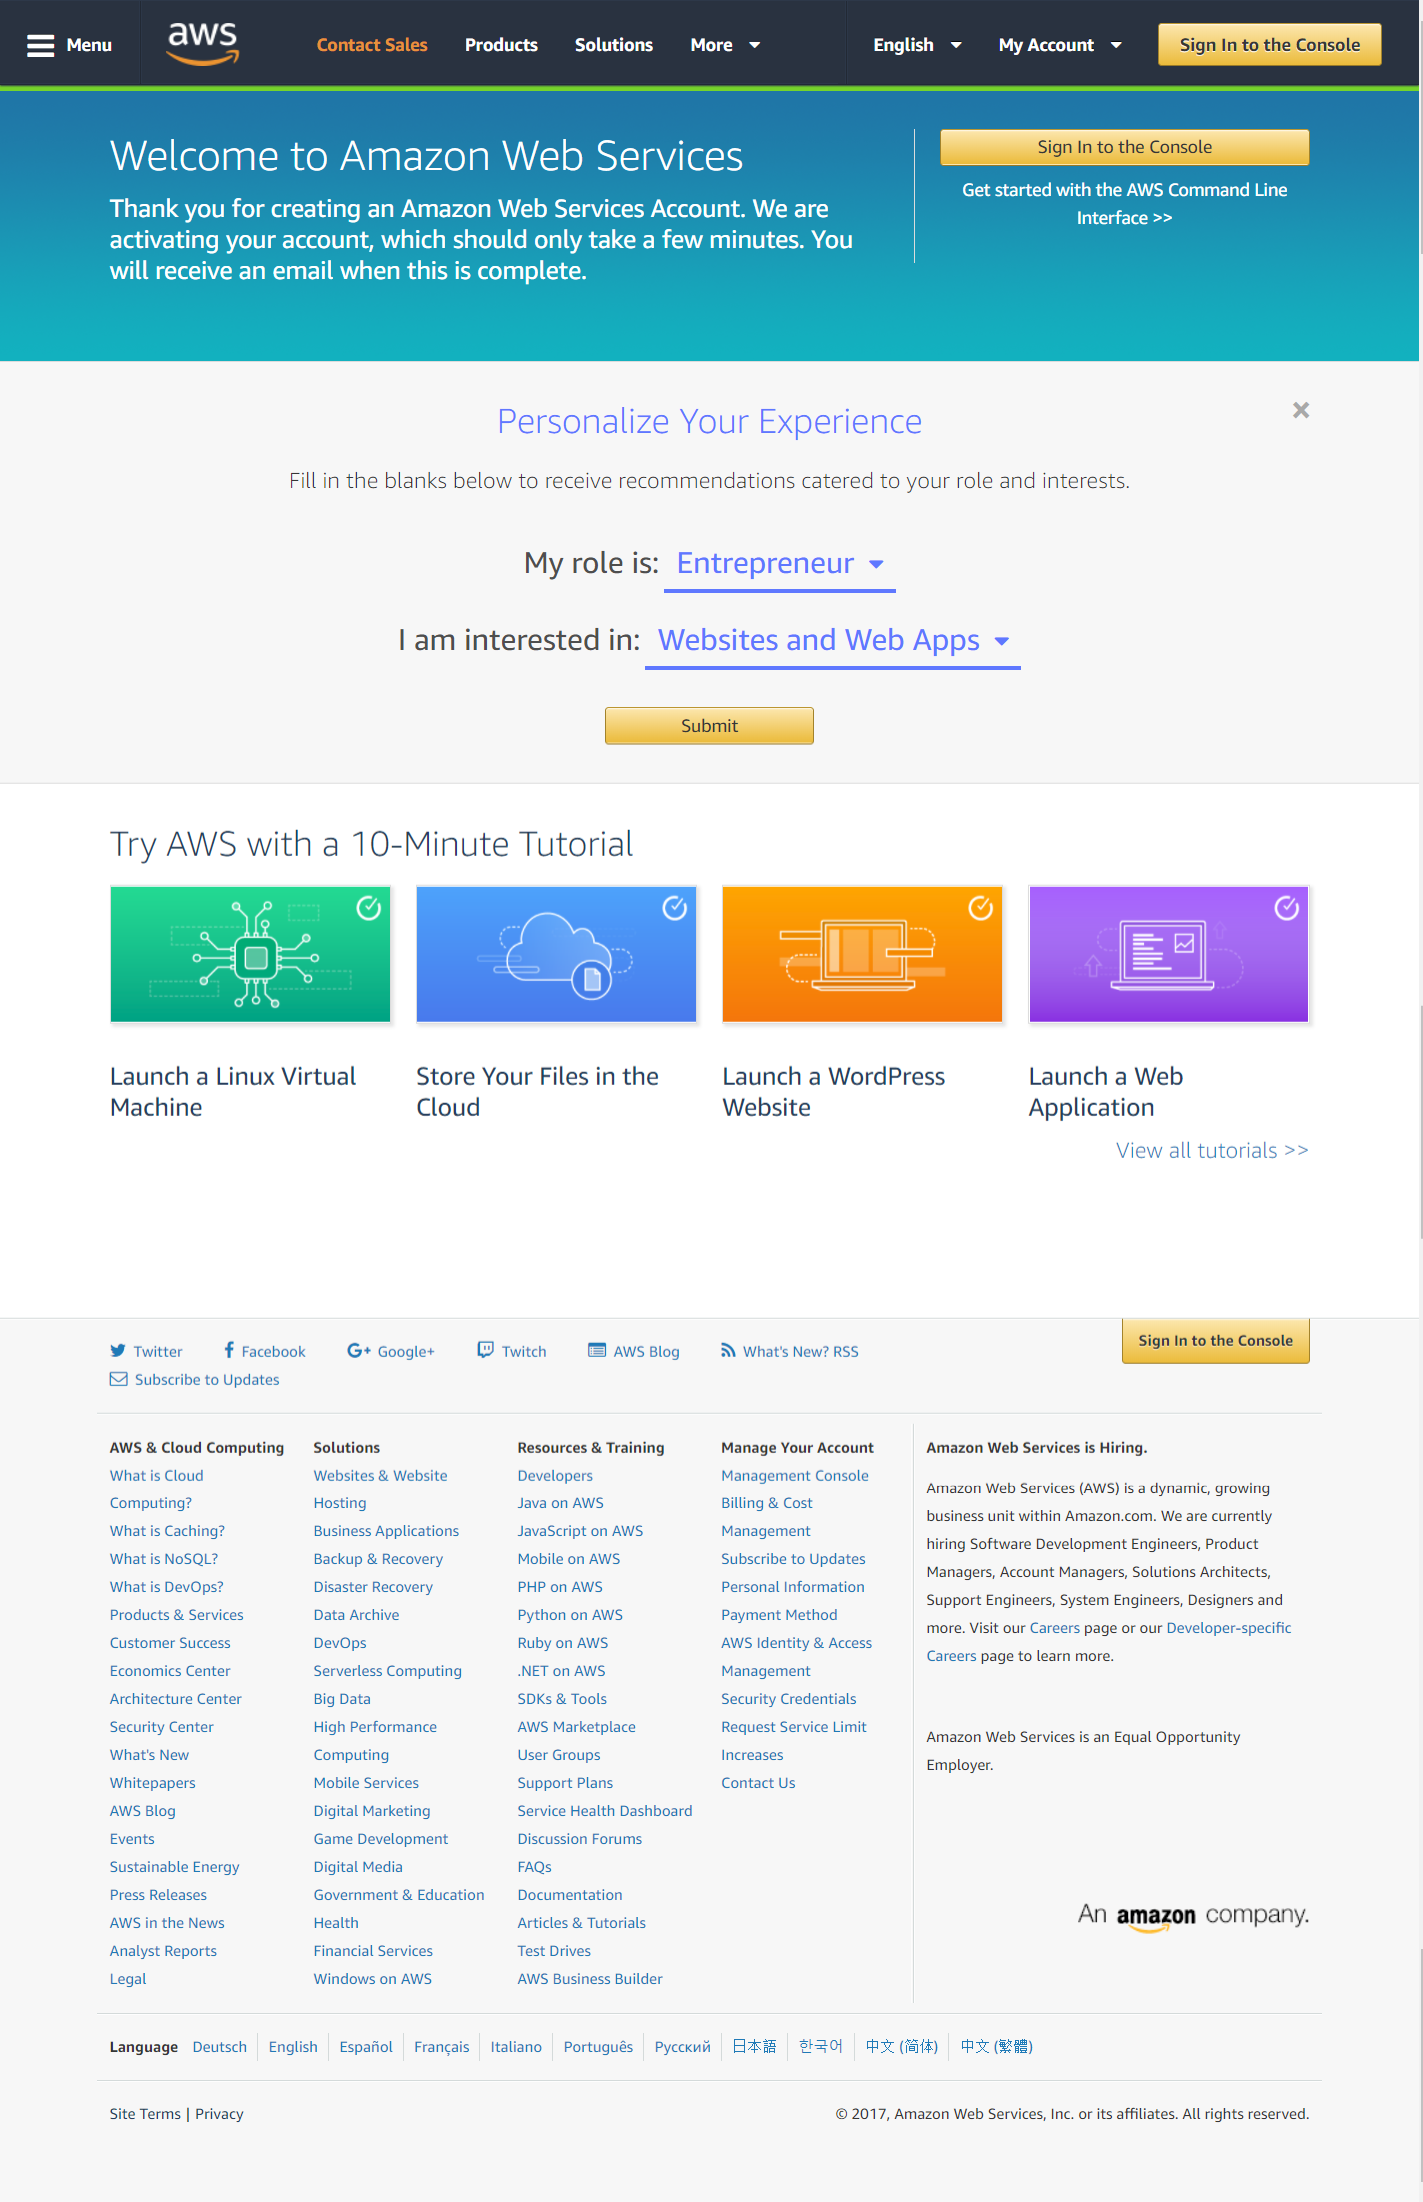
Once the new account setup process is complete, you will receive an email welcoming you to AWS and giving you a plethora of information about how to get started using their services. You can now return to the link above, or to AWS and click the “Log in to the Console” button and, when prompted, enter your new account email address and password.

Now that you have an account and are able to log into the Amazon Web Services Console, the first thing you need to do is to protect that account. The account that you just used to sign up for AWS and to sign into the console is known as the root account. This is the administrative account and it has full access to all of Amazon’s services within AWS. Although it may seem quite convenient to continue to use this account for day-to-day administration, I suggest that you follow AWS best practices and lock this account down and create a new account that will be used for creating resources within AWS. To do this, let’s take a look at your first AWS managed service, IAM.
When you sign in with email and password, the following screen will appear.
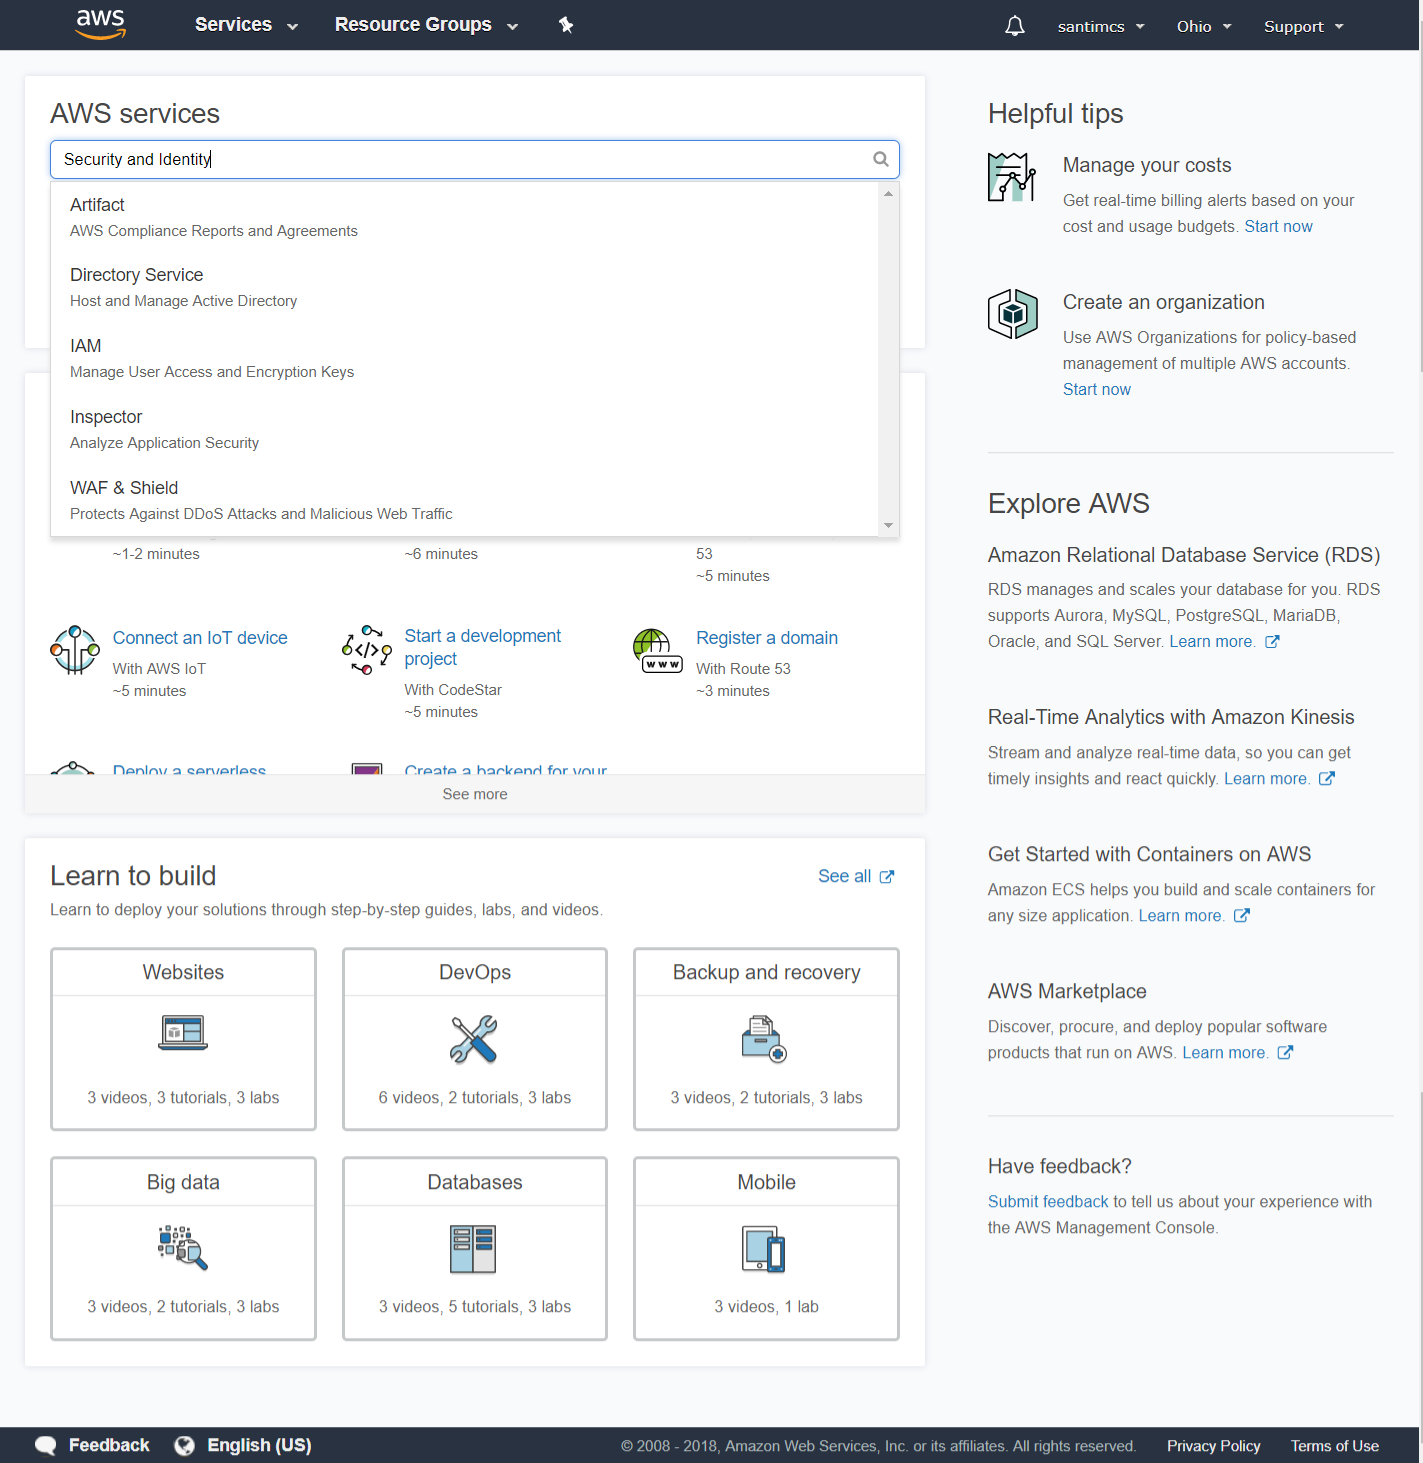
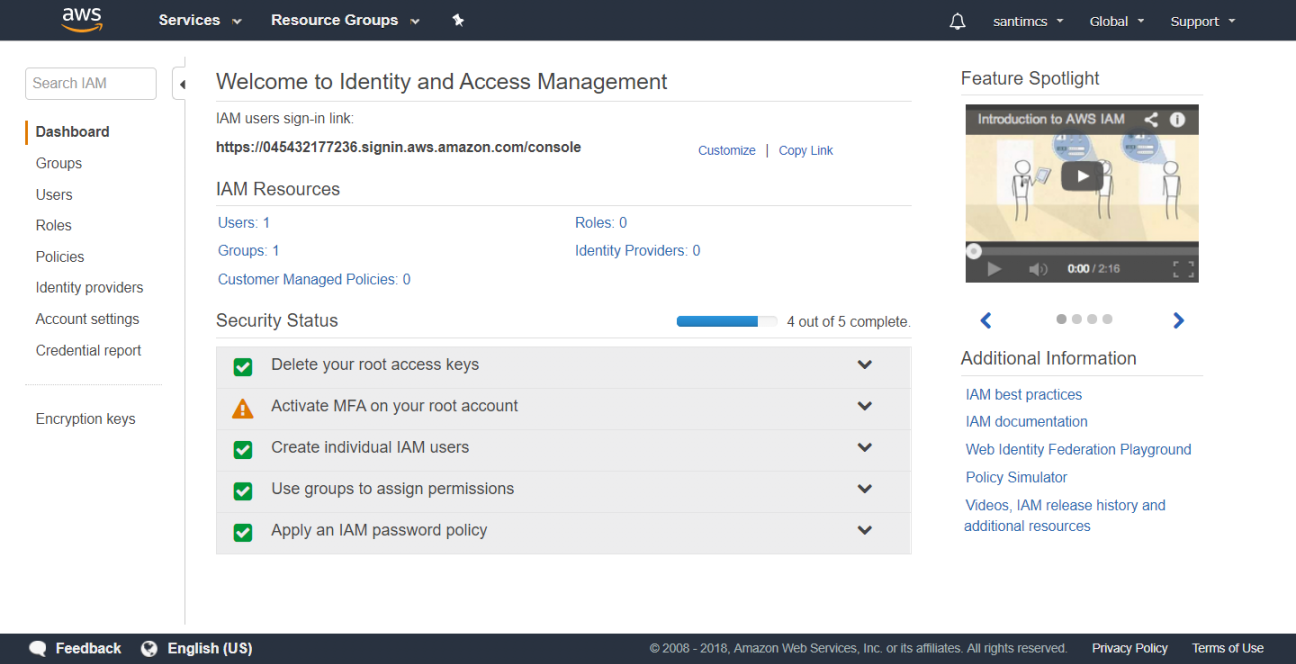
To access AWS IAM from the console screen, search for the category “Security and Identity.” Underneath this category you will see a link for IAM, so click it. When you access IAM, you’ll be presented with a screen similar to Figure 2-11.
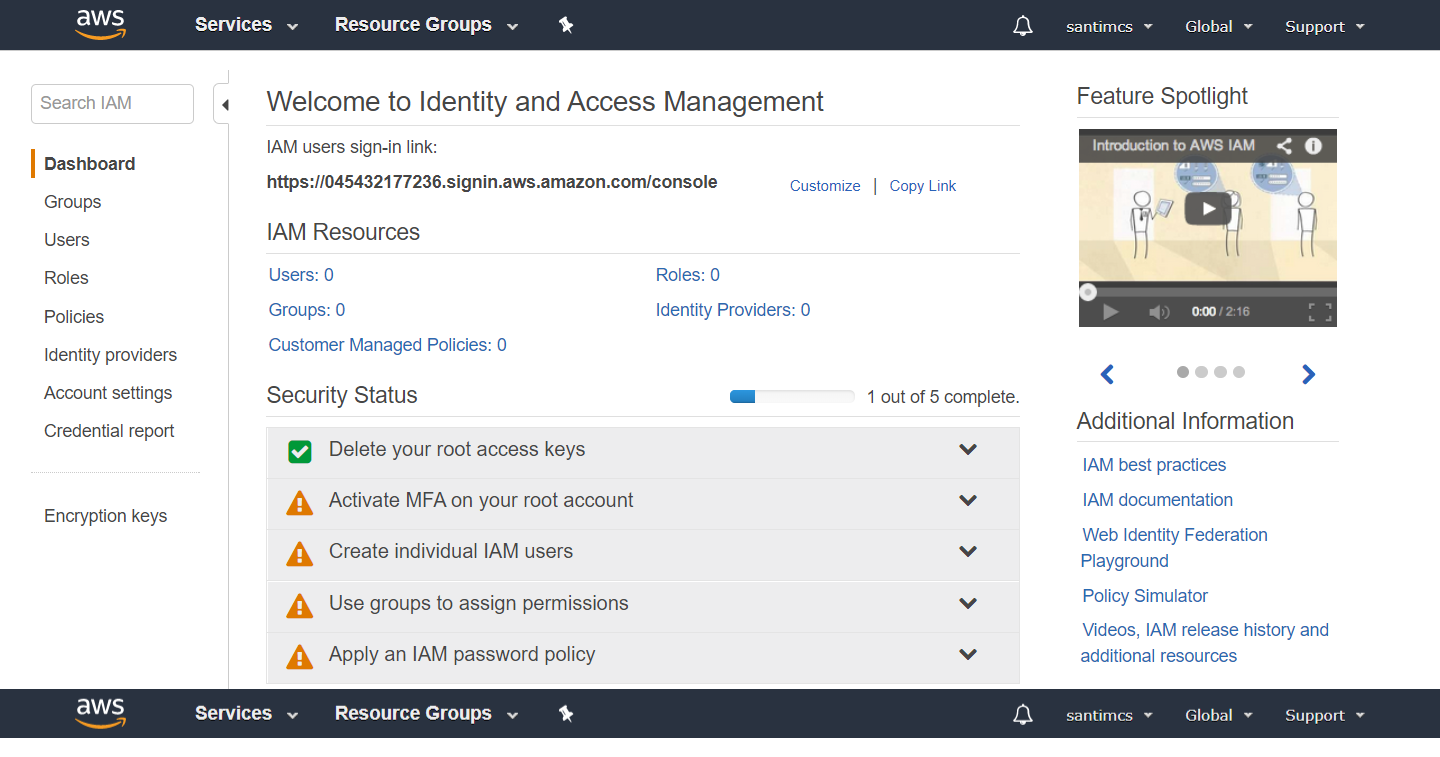
You will notice that you currently have zero users, groups, policies, roles, policies, and identity providers set up. These five areas cover what you can manage within IAM. You can create users, who can access resources in your AWS account. You can create groups, which are a collection of users. You can create roles, which are a type of account that can be assumed by other AWS resources. You can create policies, which are permissions that can be assigned to users, groups, or roles.
The following steps are needed to secure your AWS root account:
In Step 1, you will implement a strong password policy to be used in your AWS account.
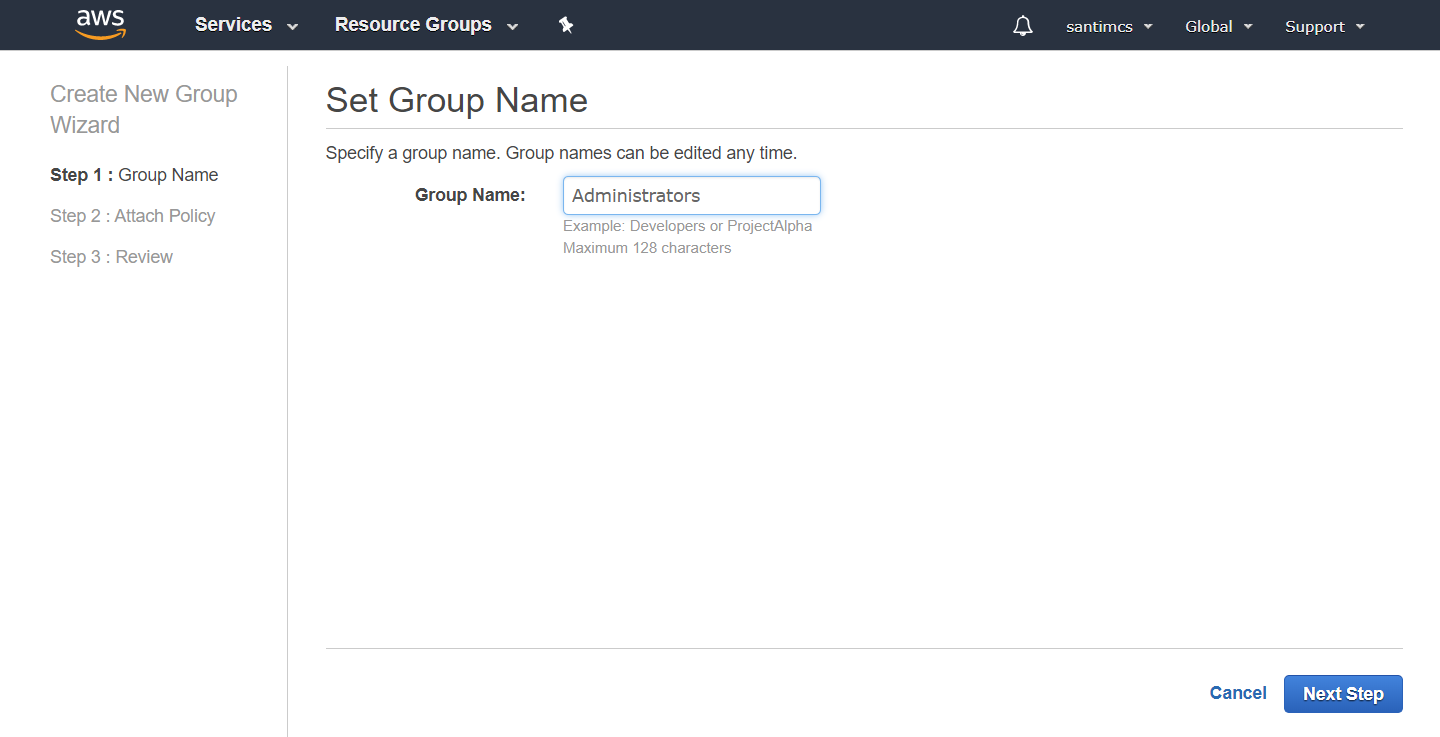
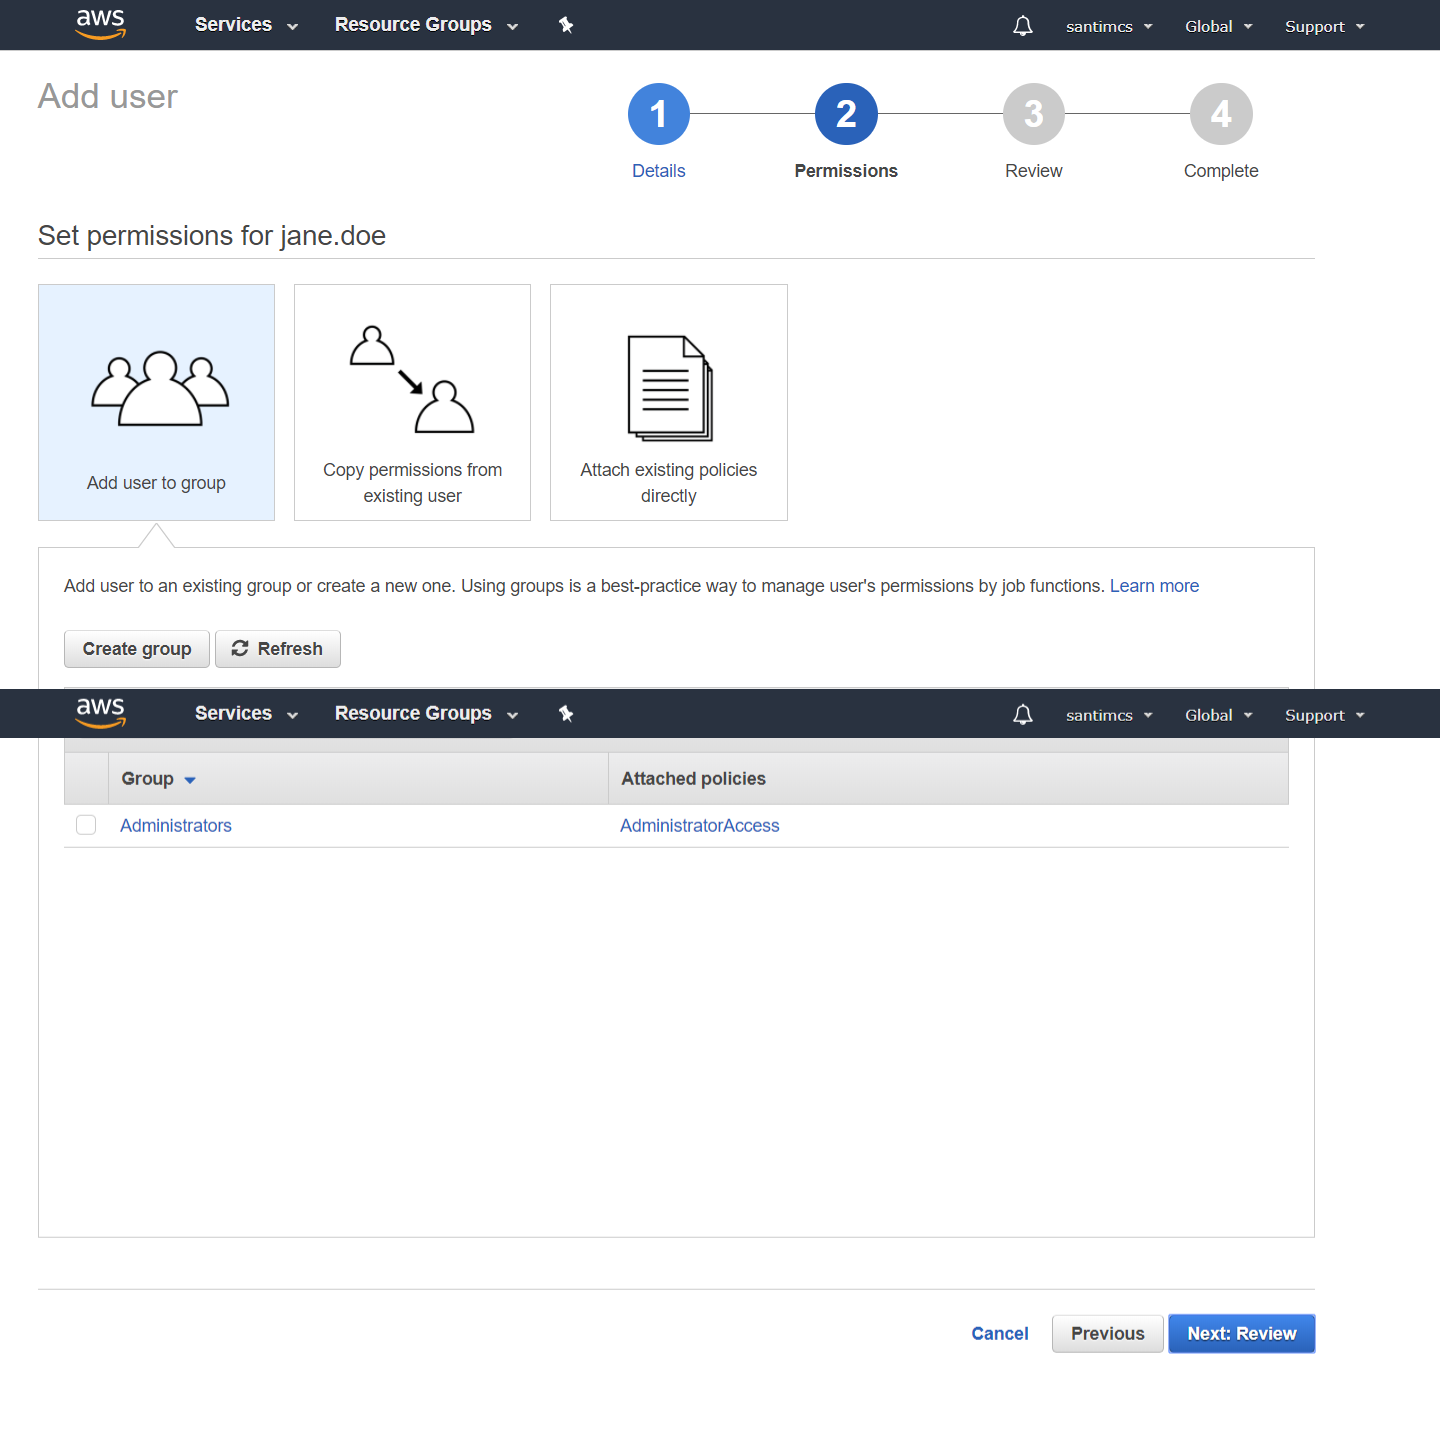
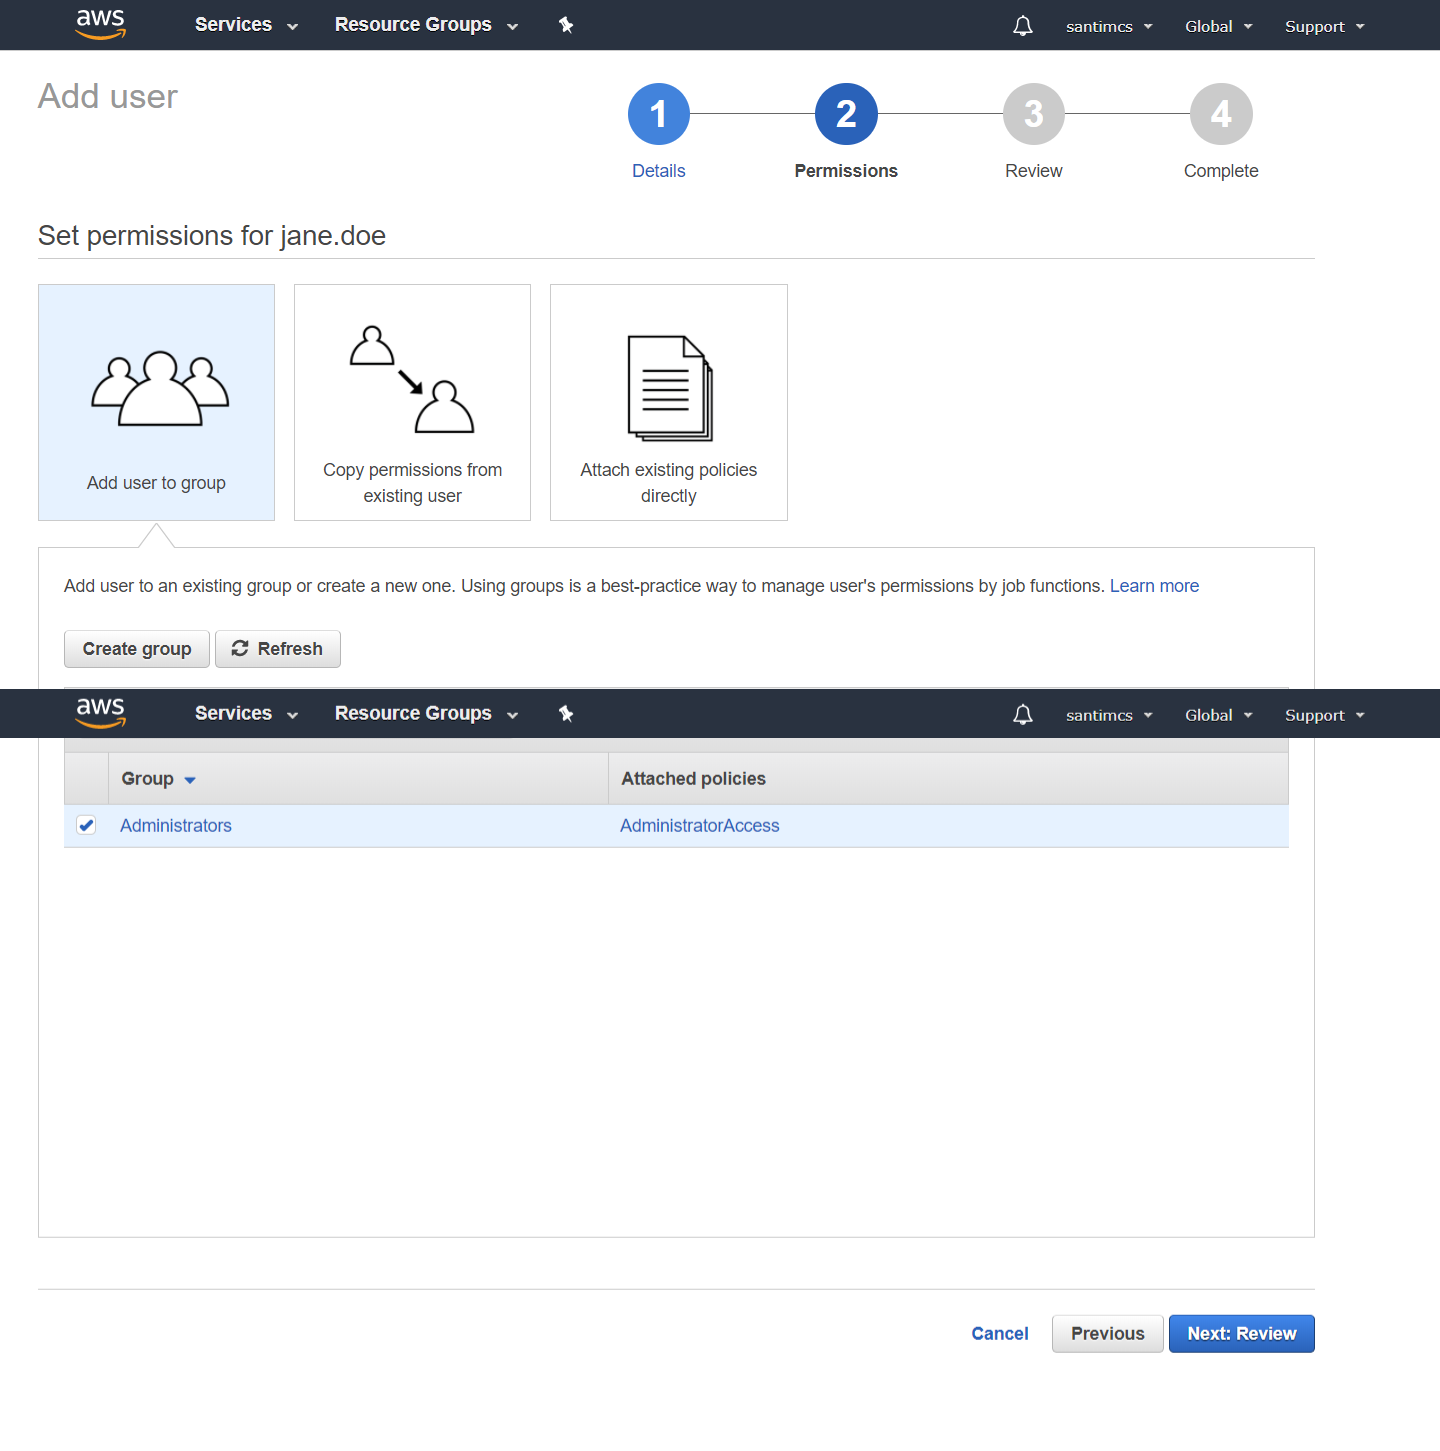
Now you’ll move to Step 2 and create your first group to hold the user that will be created in Step 3. From the password policy screen, click the Dashboard link in the top left-hand corner; this will bring you back to the AWS IAM home screen. From here, click the Groups link from the left-hand navigation and you will go to a screen where you can click the “Create New Group” button to launch the Create New Group Wizard. In the first part of this wizard, you will choose a name for your group; let’s call this first one “Administrators.”
On the Attach Policy screen you are presented with a list of prebuilt policies that make it easy to grant permissions by AWS service area.
For your case, you’re going to choose the first option, “AdministrativeAccess,” which gives Administrative Access to all AWS services. Place a checkmark in the box next to the policy option, as shown in Figure 2-14,
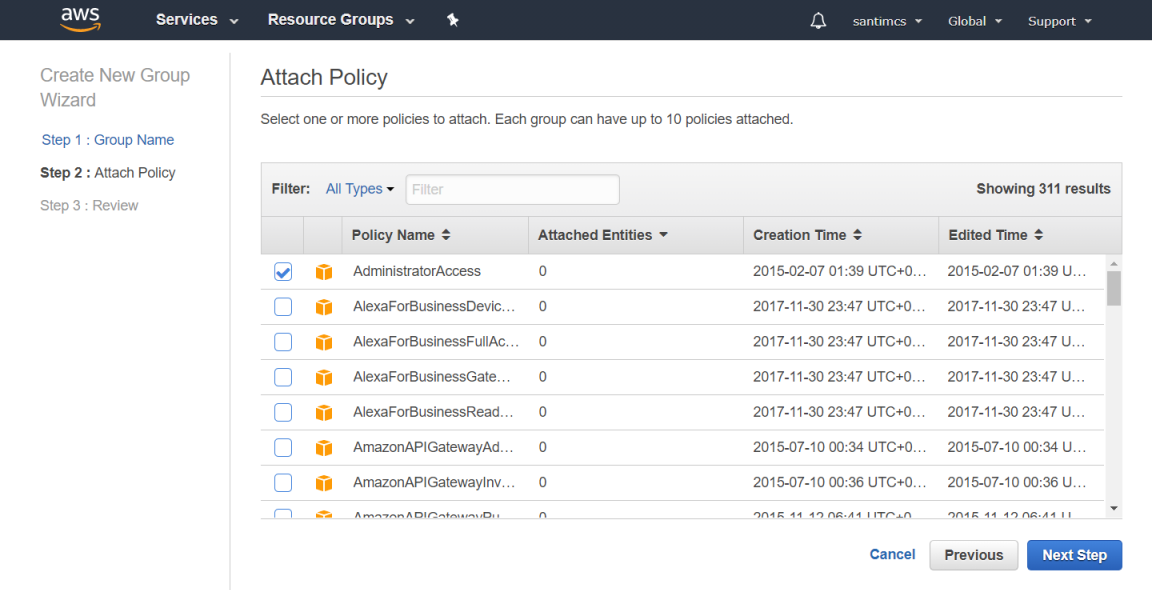
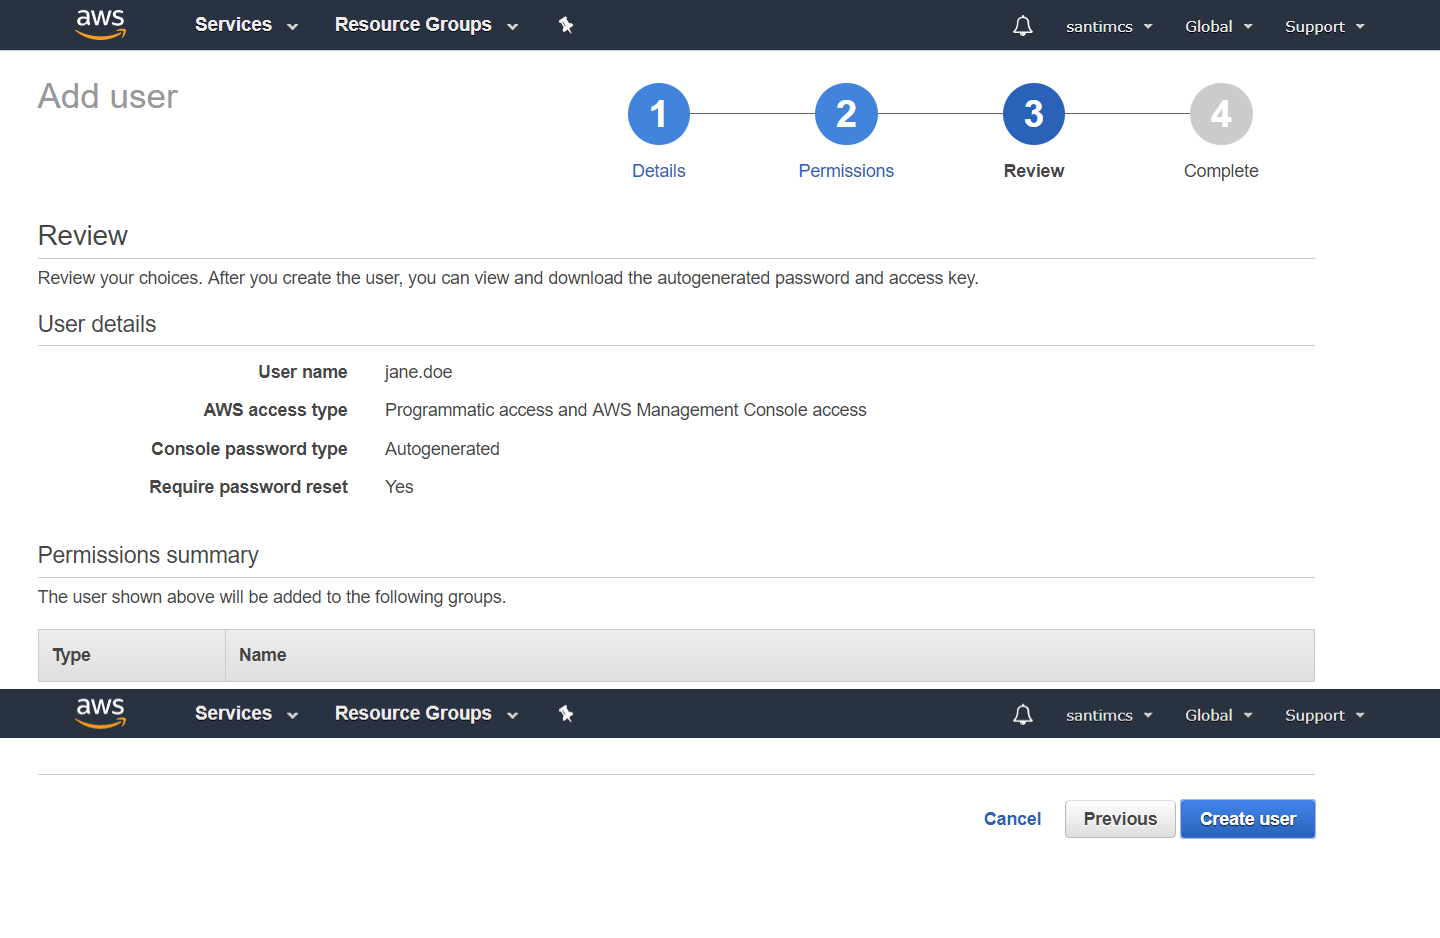
and then click the Next Step button to progress to the final step of the Create New Group Wizard, which is to review your selections.
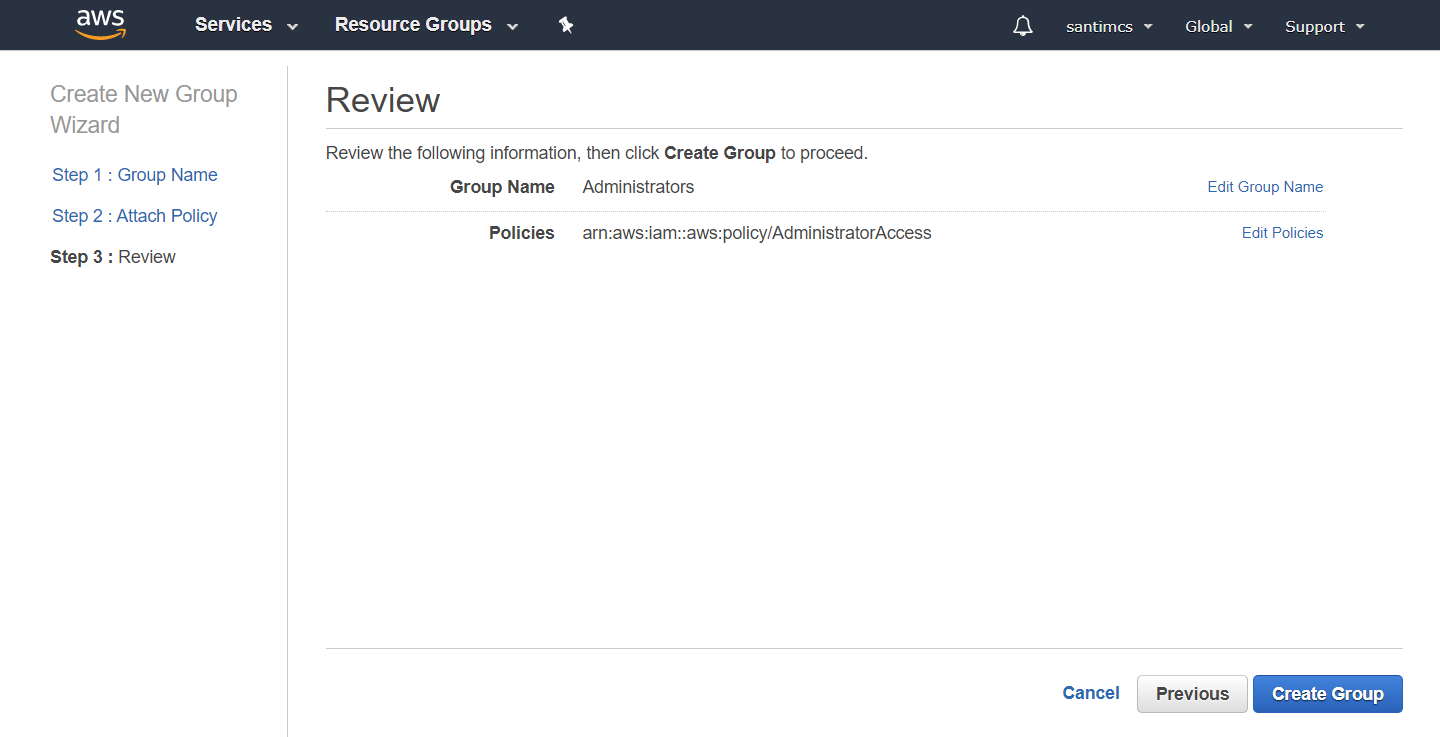
Review the information and click the Create Group button in the bottom right-hand corner of the screen. Your new group will now be listed on the Groups page.
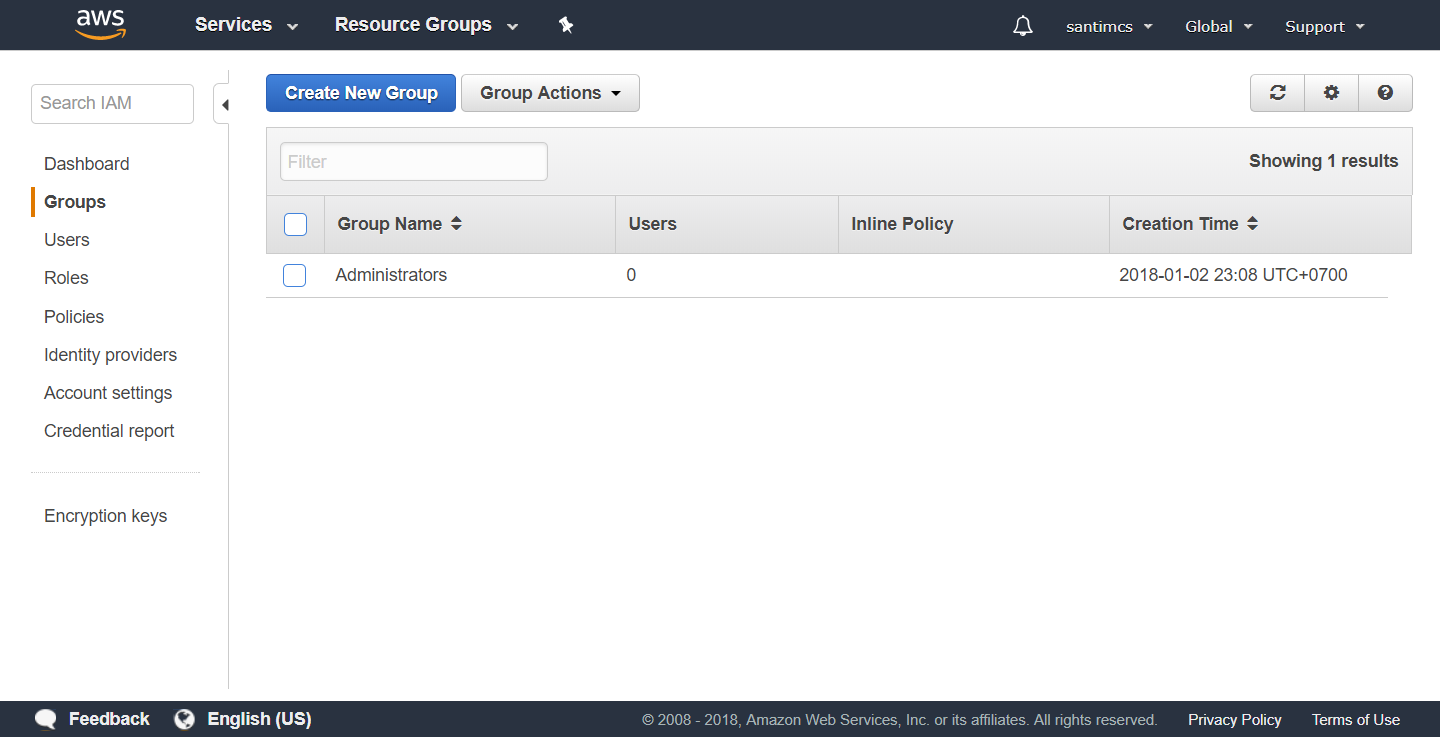
Step 3 involves creating your first user and making them a member of the Administrators group that you just created. Click the Users link in the left-hand navigation and then click the “Create New User” button to start the Create User Wizard.
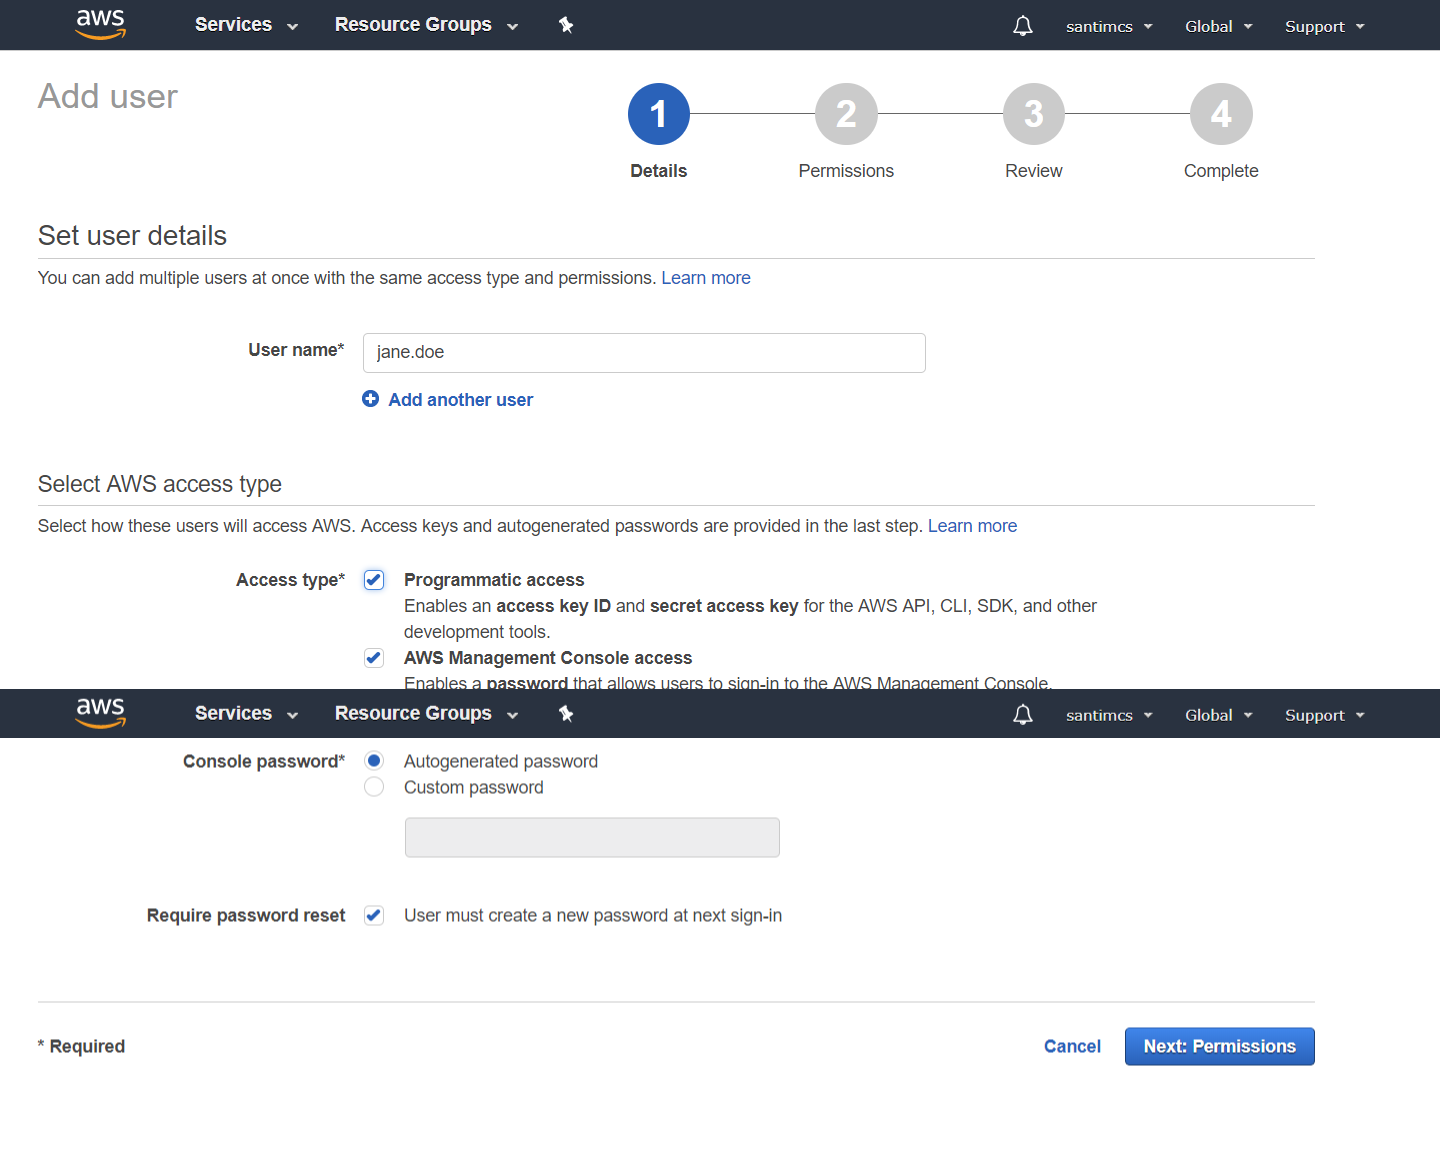
The creation of users is a pretty straightforward process: enter the username to be used and click the Create button to create the user. For your first account, I recommend using the format firstname.lastname for your user account, but feel free to use any formation that you find easy to remember. There is an important option in this process, which is enabled by default, to generate access keys for each user. You want to make sure that you do this for any account that will need access to the AWS Console (logging in via your IAM users sign-in URL, shown on the IAM Dashboard) as well as through other tools or integration points. You will be using an integration point that will require these access keys in the next chapter, so be sure to download the credentials after the user is created and keep this file in a very safe place that you will be able to access when the time comes.
After the user is created, you will be prompted with the screen shown in Figure 2-18.

The Download Credentials button can be found in the bottom left-hand corner of this screen. Once you have downloaded the user credential files, which will be in CSV format, you can click the Close button to exit out of the New User Wizard.
The last step in securing your AWS Root Account is to enable multi-factor authentication (MFA). To do this last step, let’s head back to the IAM Dashboard/Home screen by clicking the Dashboard link in the left-hand navigation. At this point, your Security Status section should be looking much better, with four of the five items listed with a green checkbox next to them showing that they have been completed.
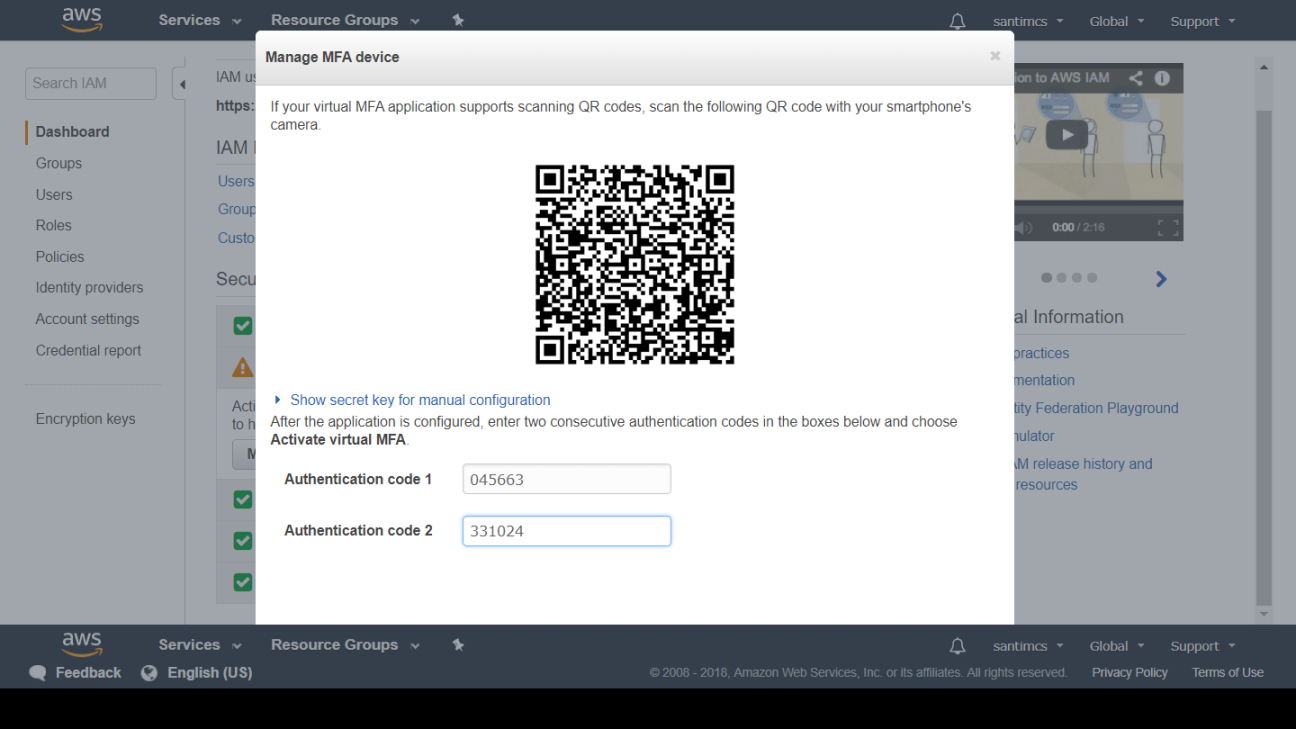
The last item listed with a caution symbol is to enable multi-factor authentication on the AWS root account. After you’ve downloaded Google Authenticator on your mobile phone, click the drop-down arrow to the right of “Activate MFA on your root account” and then click the “Manage MFA” button. Choose the “A virtual MFA device” radio button and click the “Next Step” button. Click the Next Step button when you’re ready to proceed. From the next screen you can use your smart phone to scan the QR code presented or use the secret keys for manual configuration. Once this information is entered into your MFA application, you’ll be presented with your first 6-digit MFA code, so enter it in the first text input field. You will then wait 30 seconds until the MFA 6-digit code refreshes and enter that next code in the sequence into the second text input field and click the “Activate MFA Device” button and then the Finish button. Once you do this, your AWS root account will now have MFA enabled; each time you log in with this account you’ll need to use your AWS root account username and password as well as the generated MFA code to gain access to the AWS Console .
In this chapter, you signed up for an AWS account, secured your root account to minimize the risk of it falling into the hands of evil-doers, created an administrative user account that you’ll use for the rest of this book, and briefly explored the different options that you’ll use to access your account resources and services. AWS IAM is an important managed service and is one that you will get to use in later chapters when you create additional accounts for collaborators, staff members, and more. You’re now prepared to jump into the most important service that will help you with hosting your first web scenario: AWS Simple Storage Service (AWS S3).
Sign in

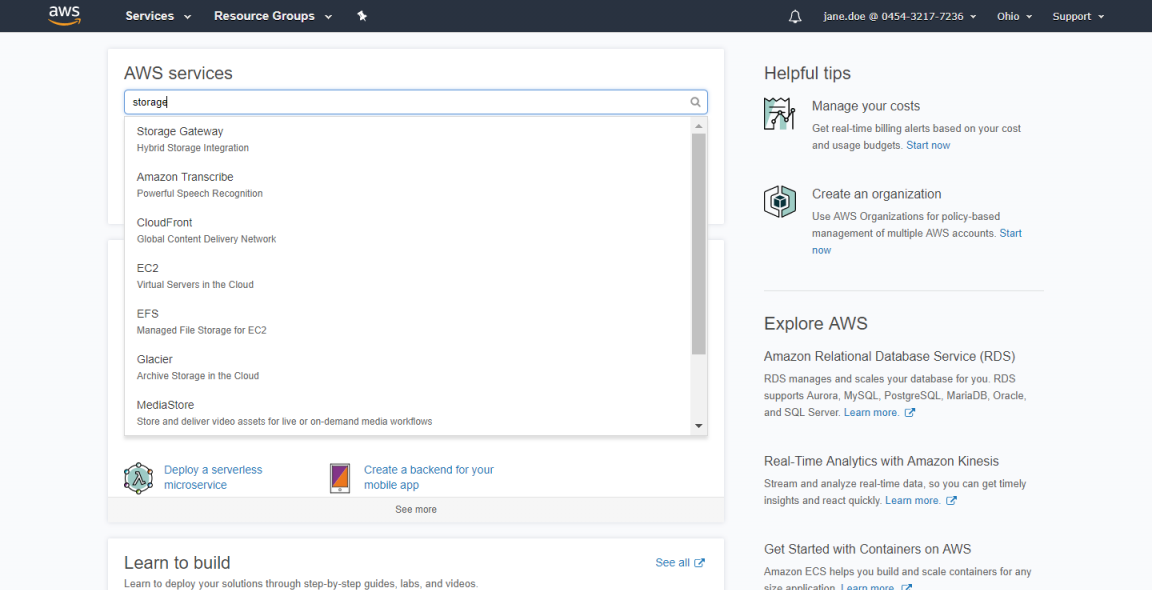
Enter "storage" and select S3
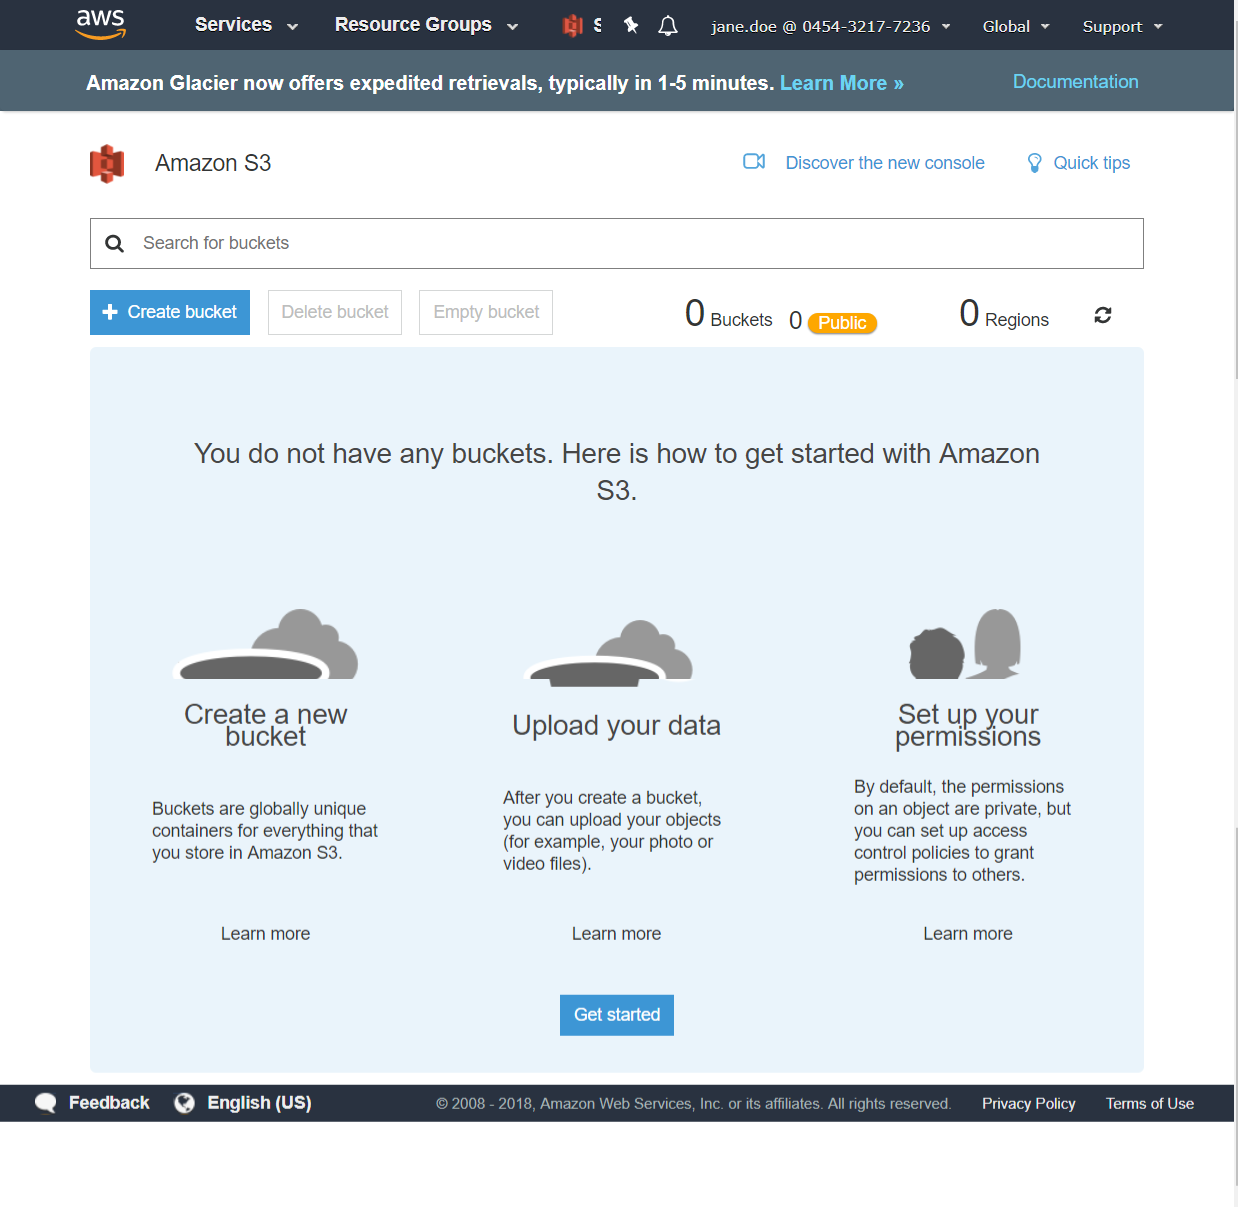
The following screen will appear.
After clicking the Create bucket button, you’ll be taken to a screen similar to Figure 3-4 where you will enter your bucket name (must be unique name) and choose an AWS region where the bucket will be created.
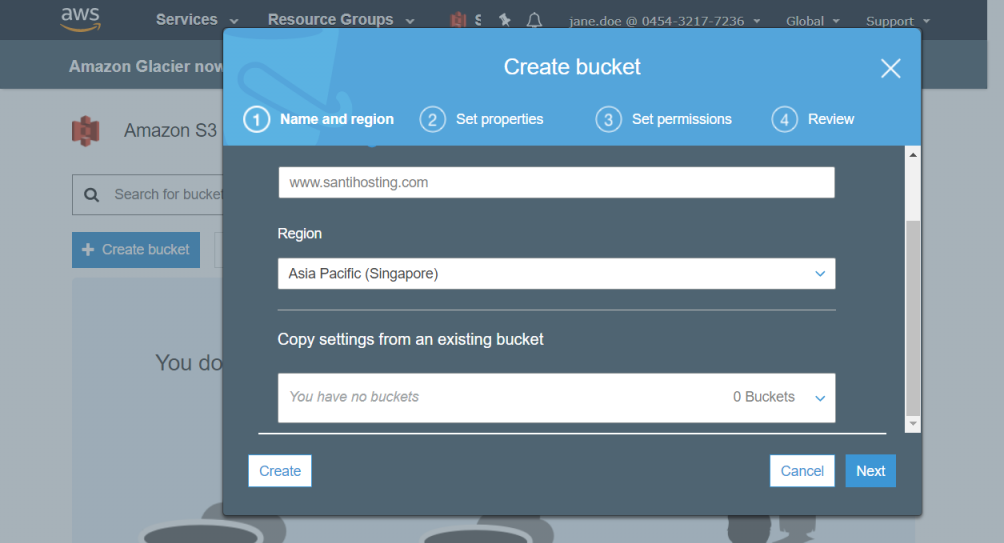
Click Next
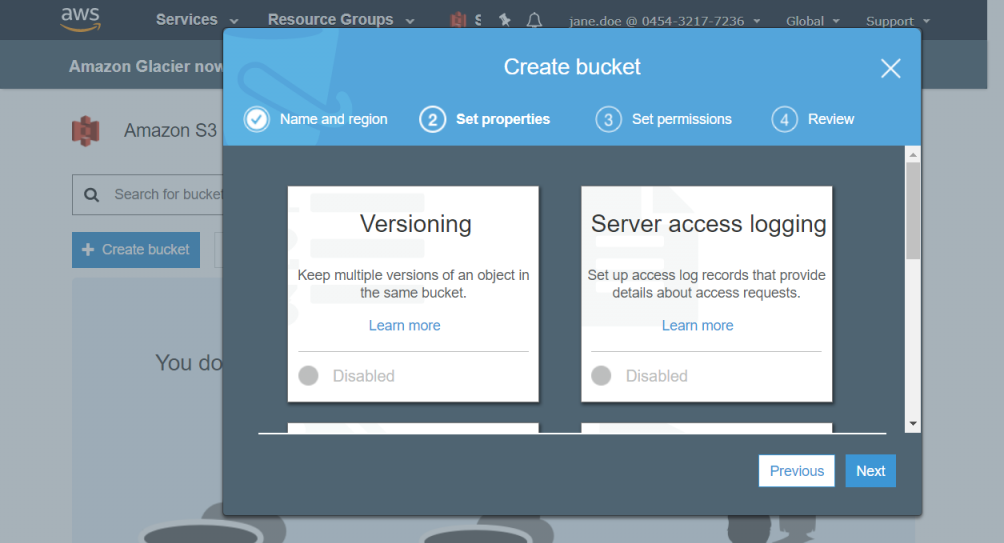
Click Next
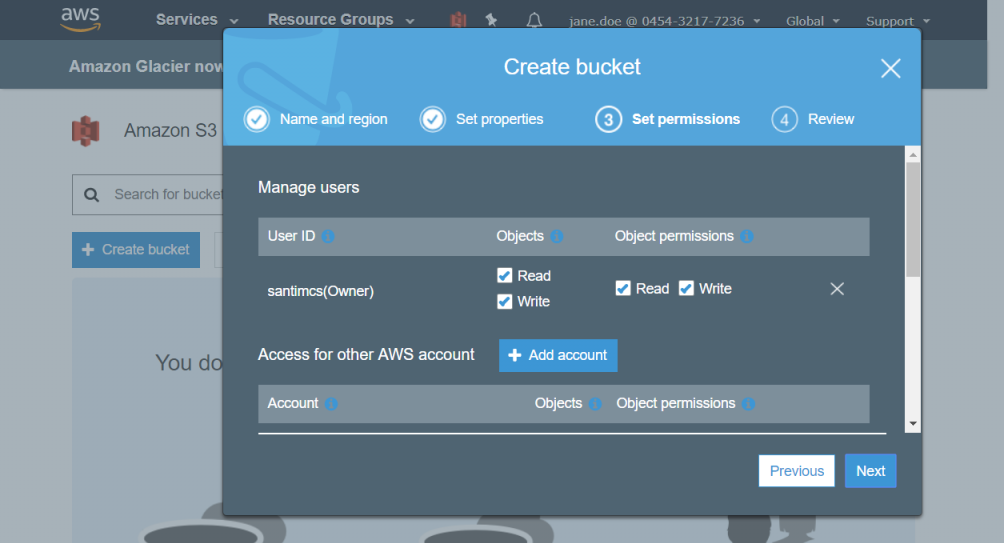
Click Next
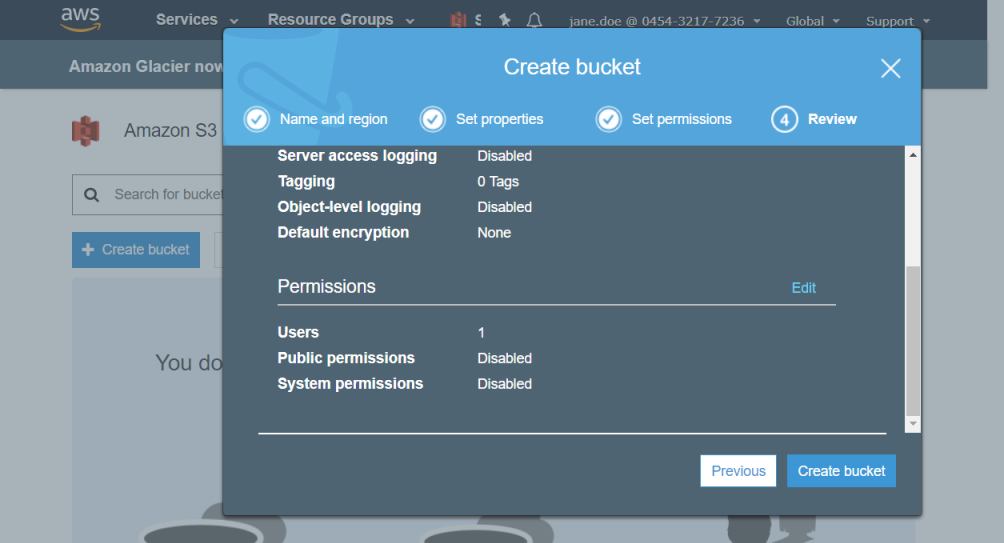
Click Create bucket button, the following screen wills3 appear.
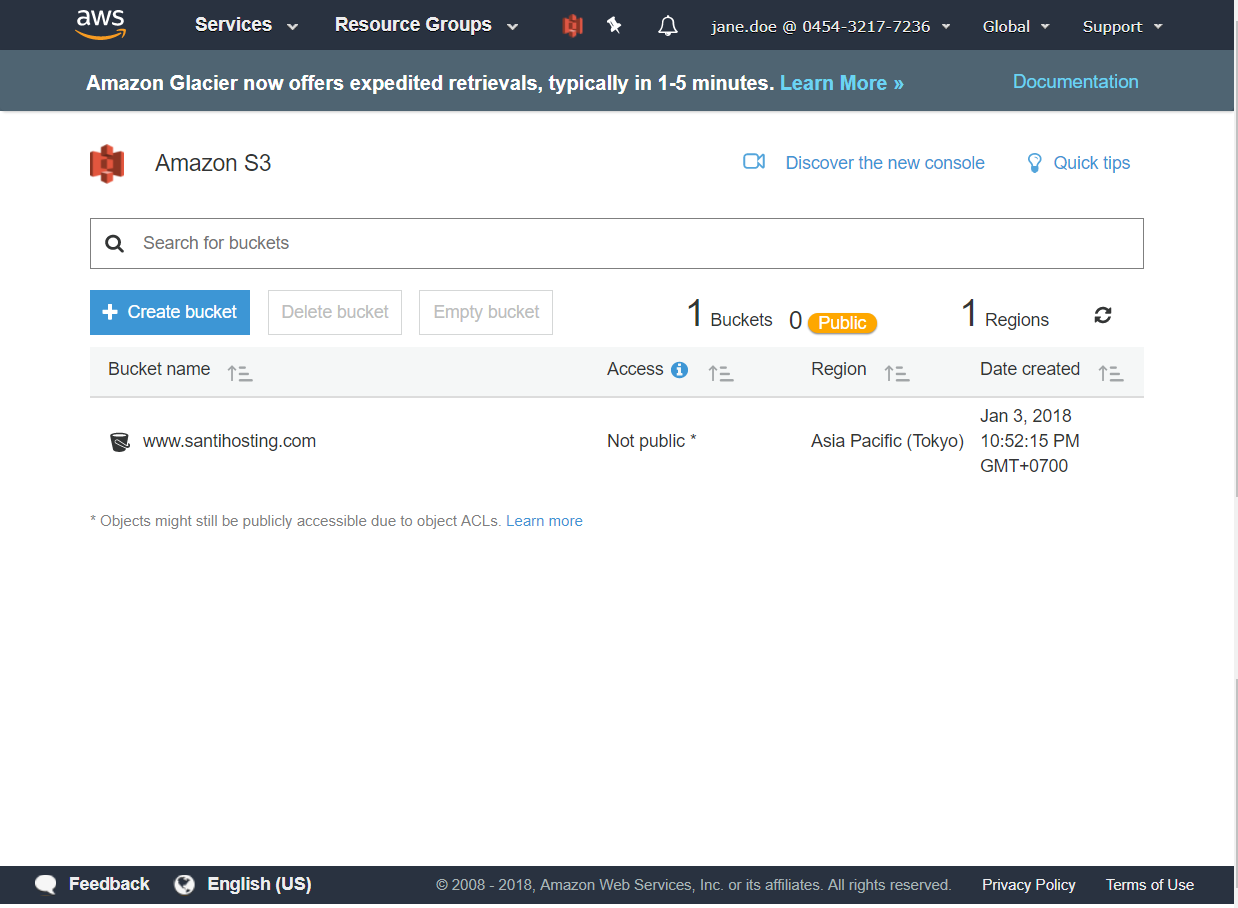
Click at the bucket name link, the following screen will appear.
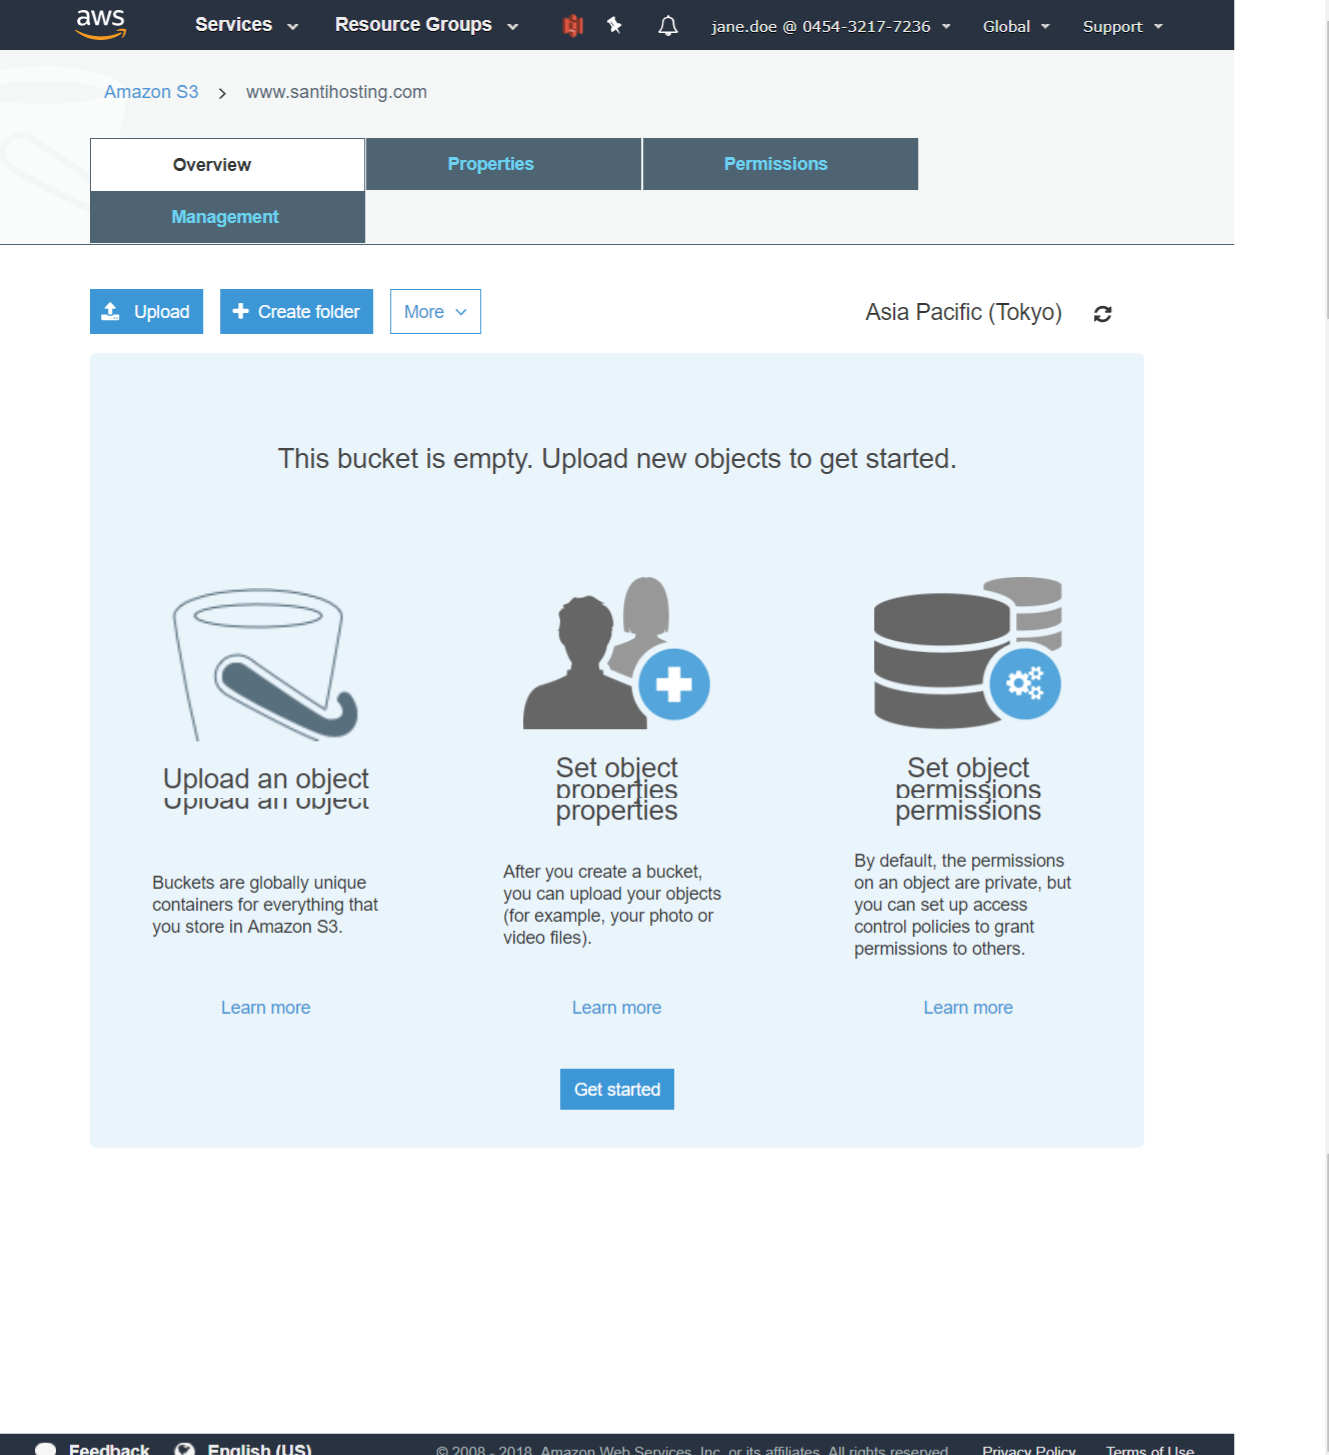
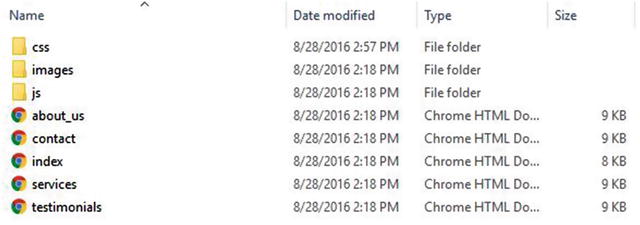
Drag folders and files from explorer to upload panel.
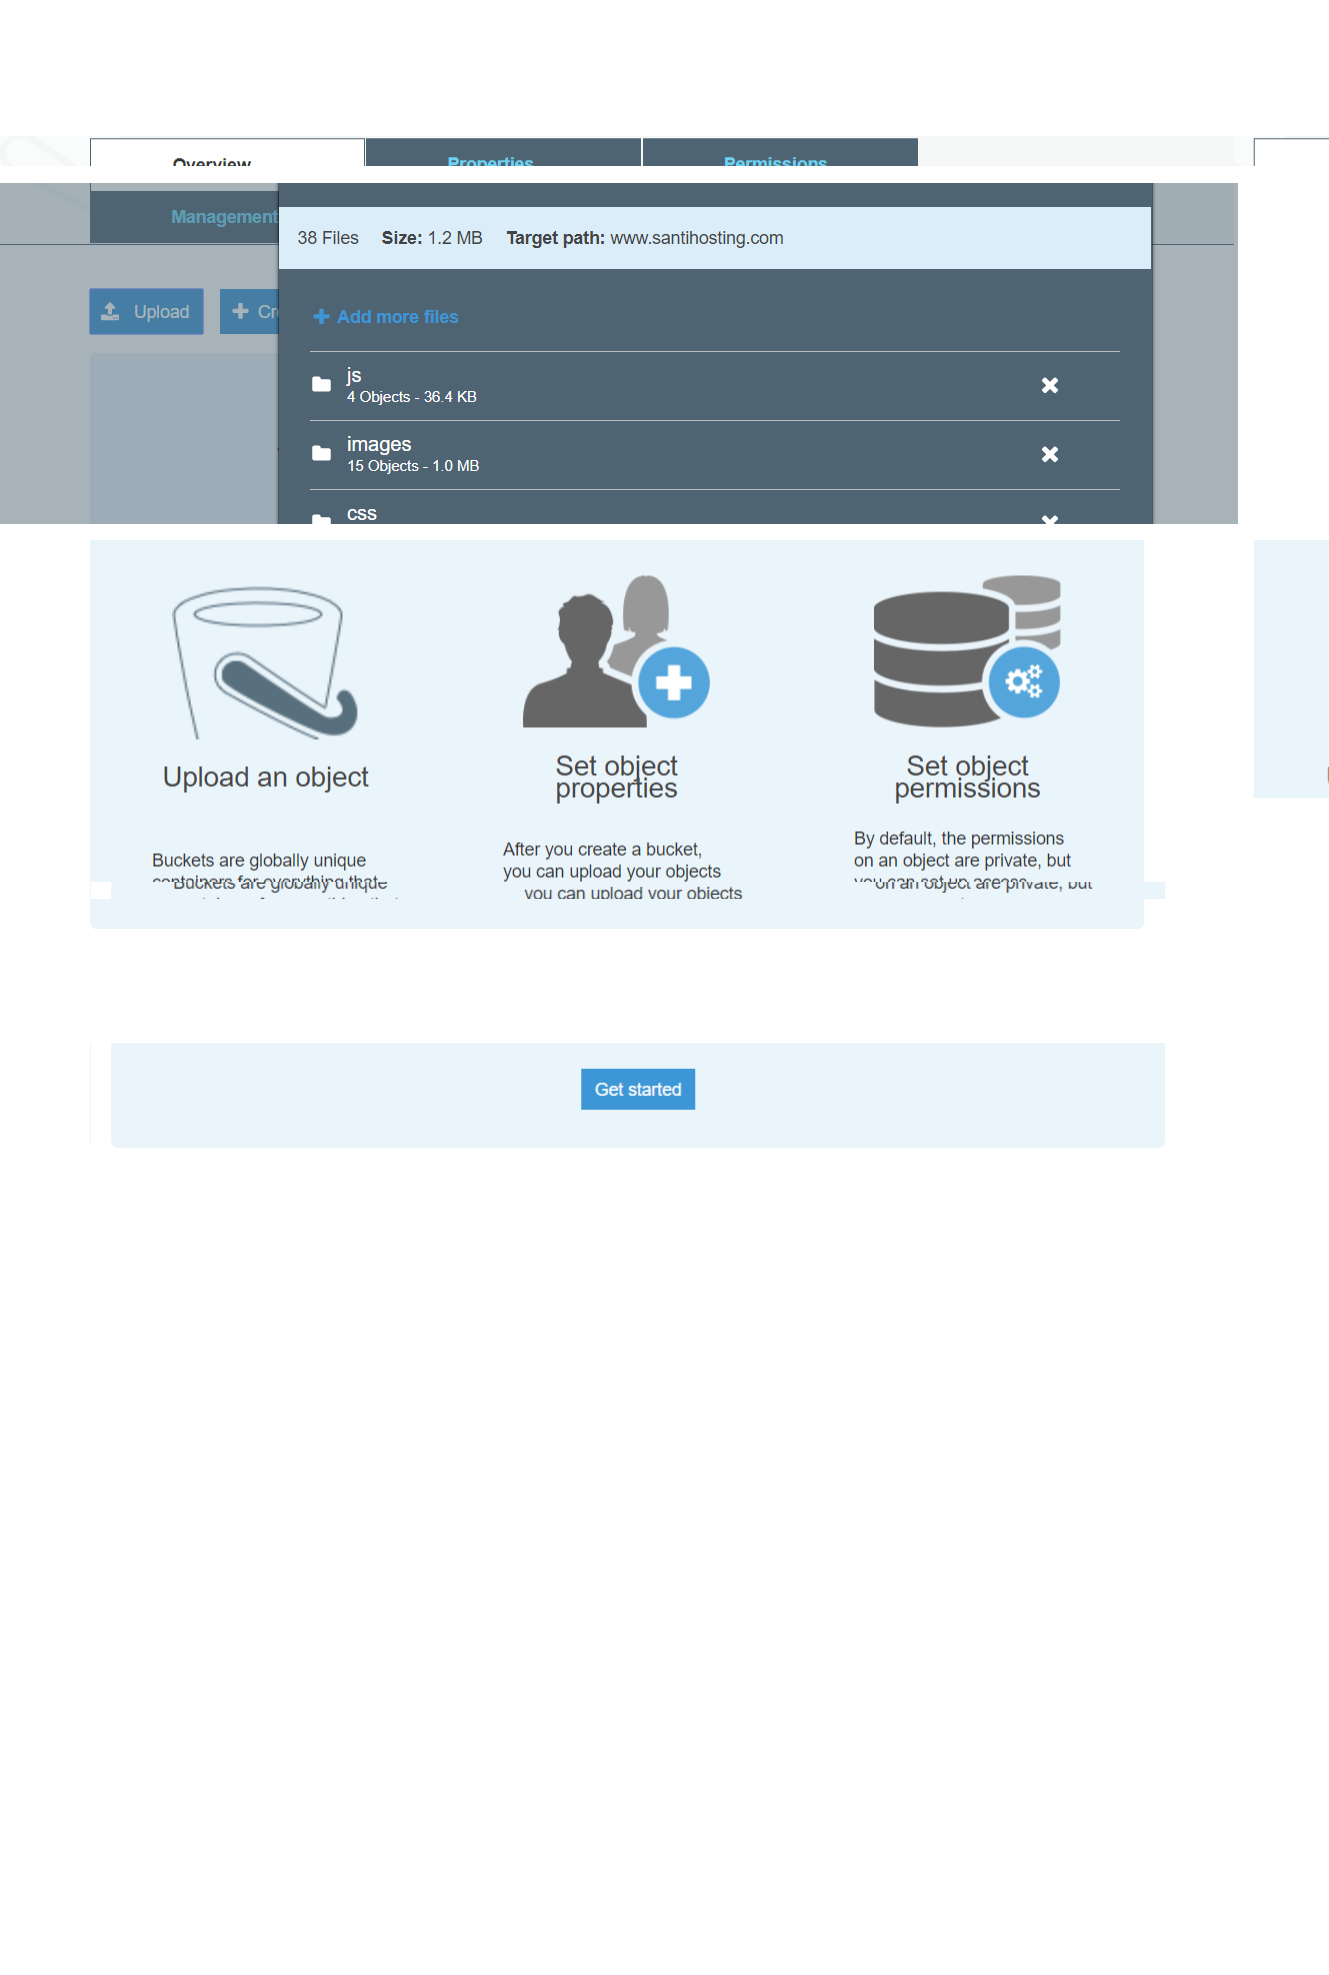
Click the Upload button. The upload process will start; when completed, you will be presented with a screen similar to Figure 3-11.
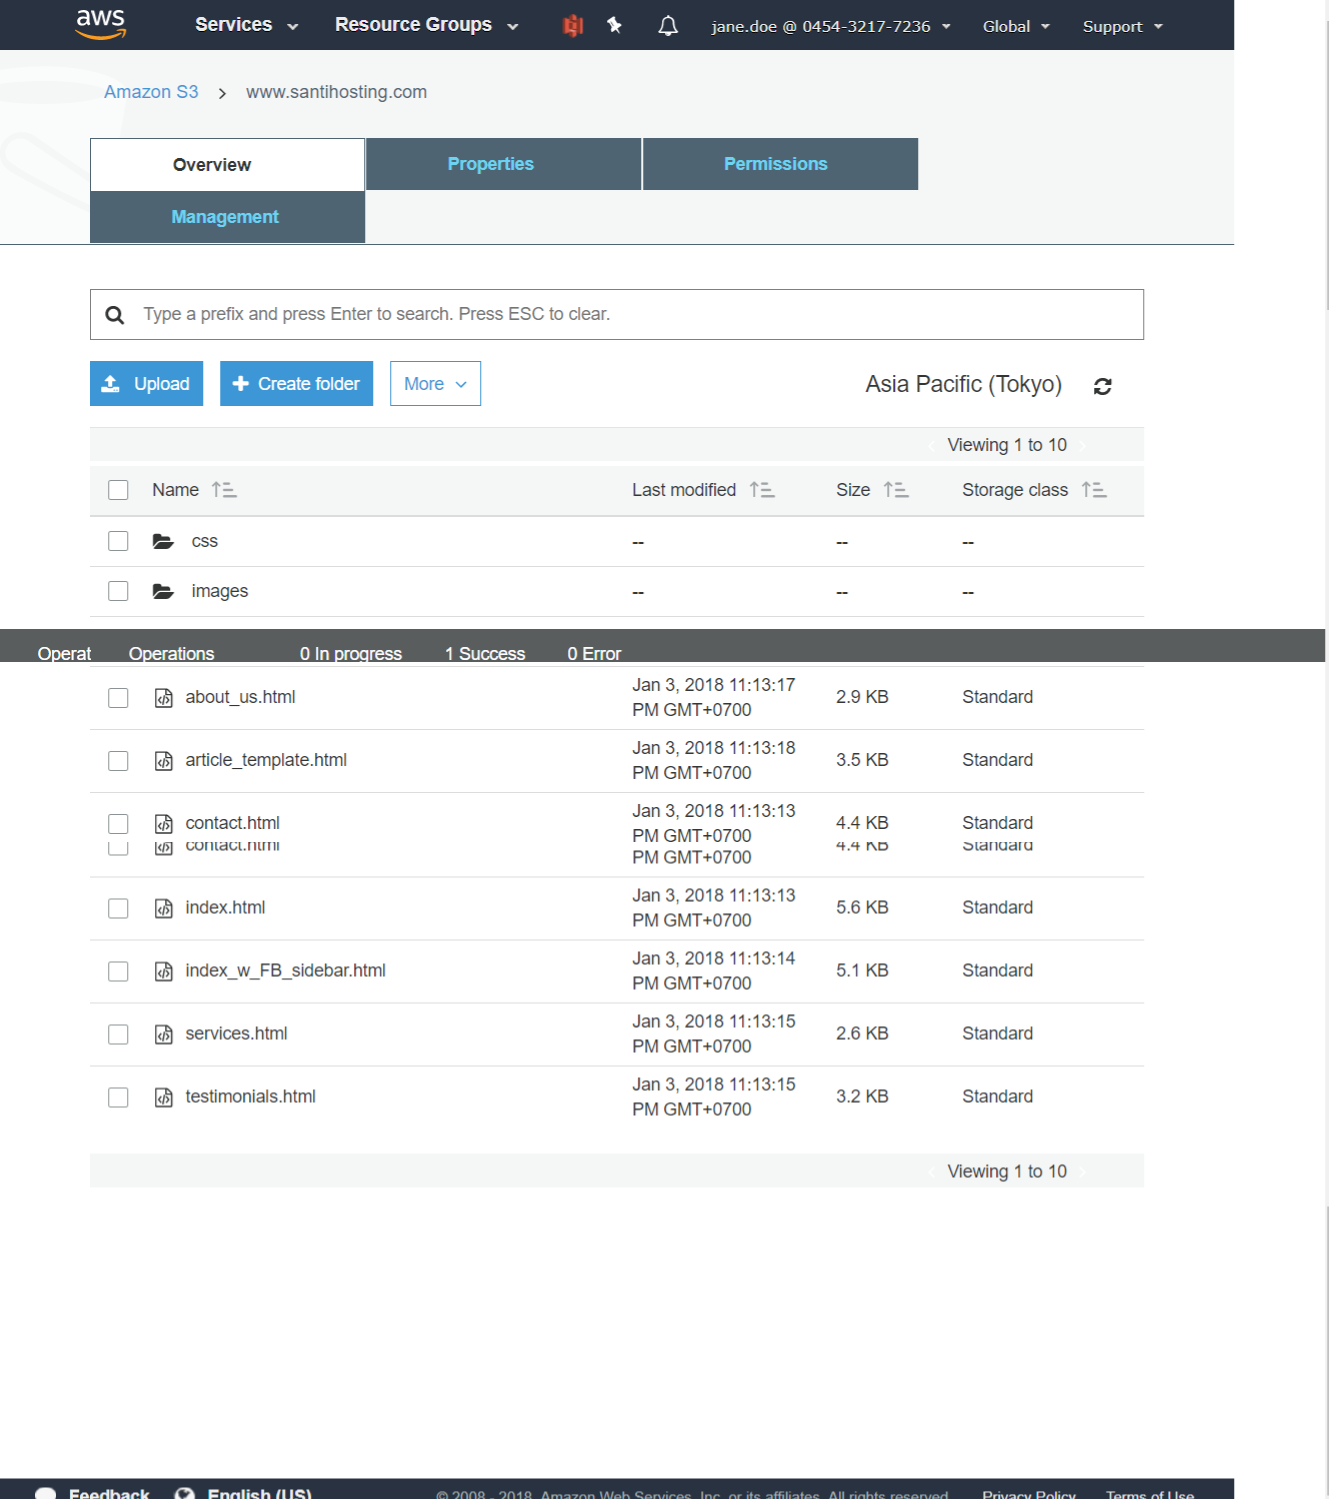
When an object is selected in S3, you will see all of the information related to that object. Figure 3-12 shows the object name, the S3 bucket in which it resides, and additional details such as object size, last modified date, and more.

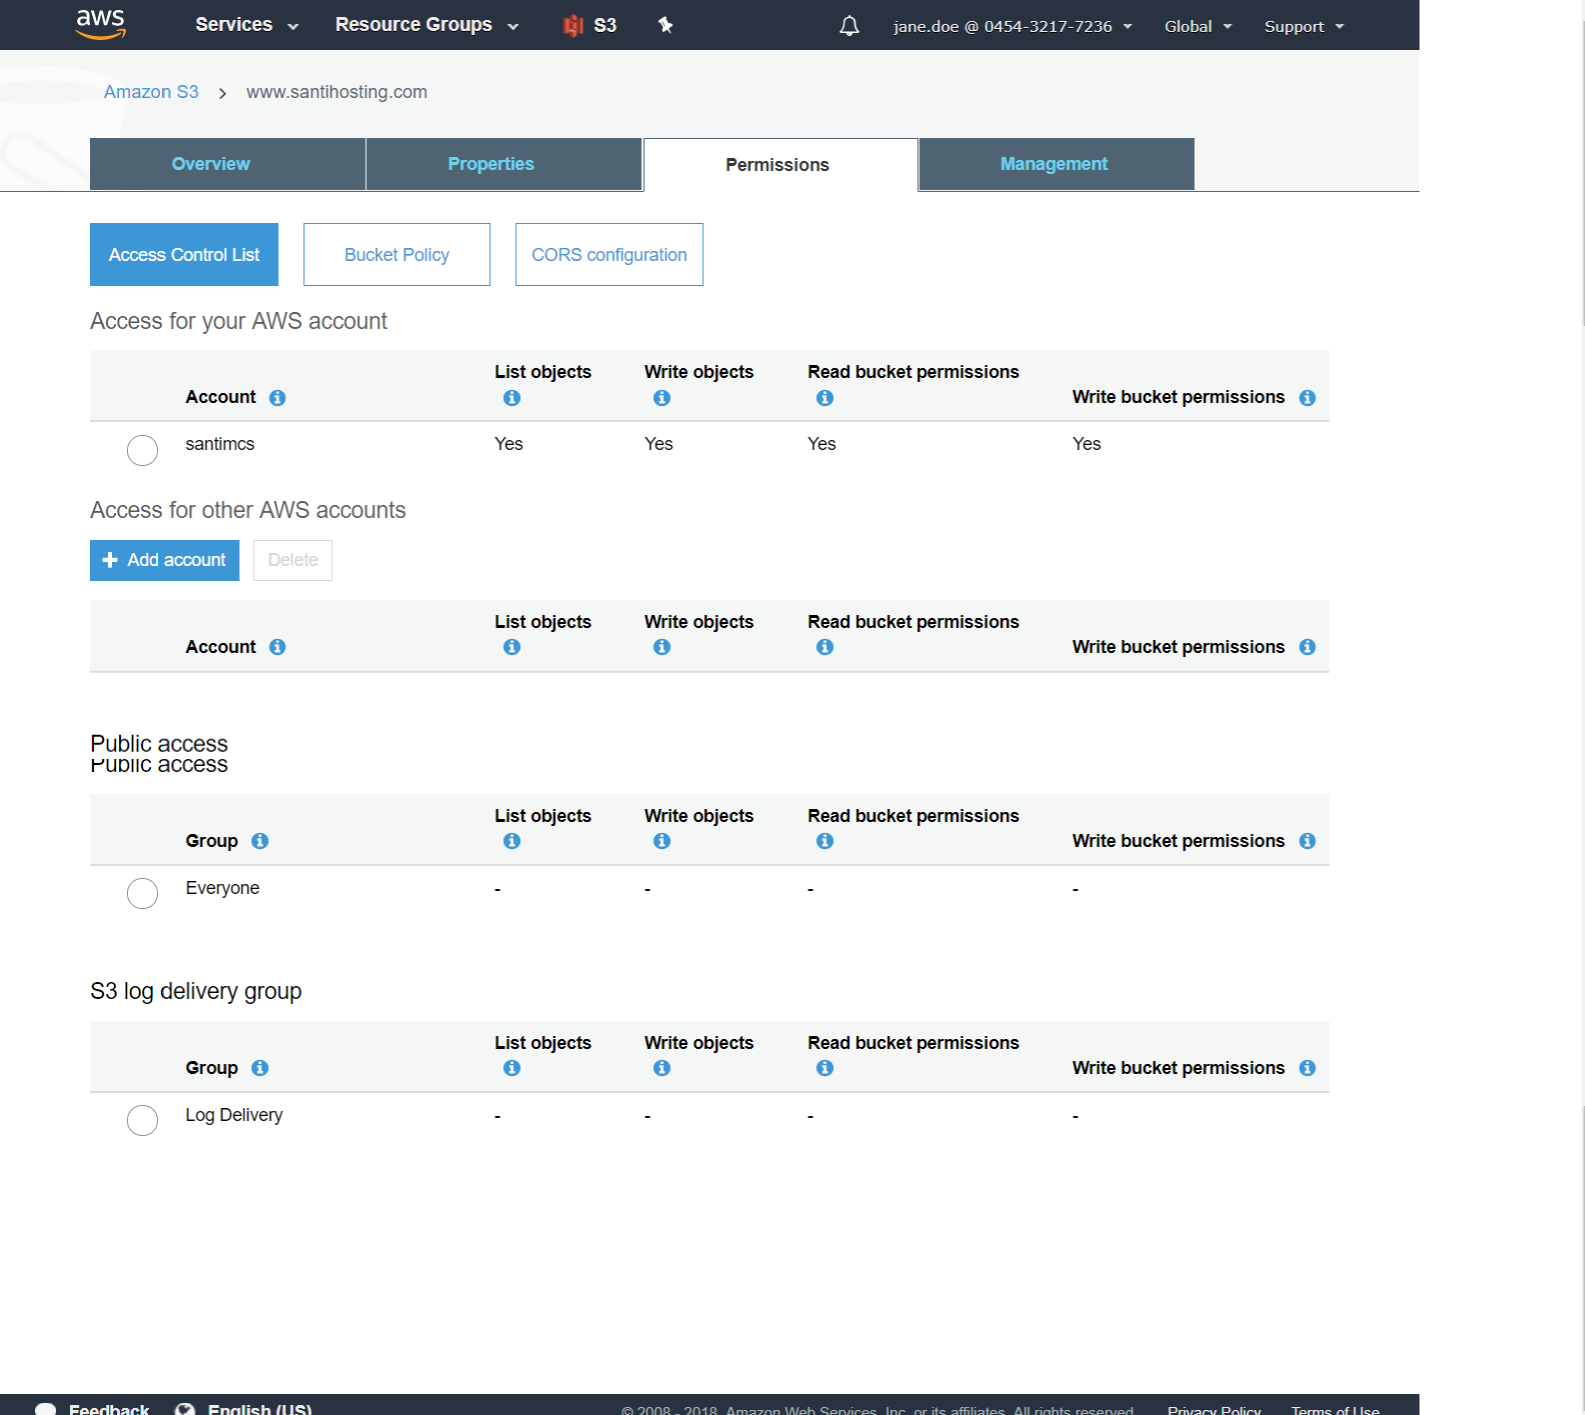
The first thing that you need to do is to make your content available for your visitors to view. As you may remember from Chapter 3, I mentioned that content has no permissions set on it when you upload it. When you try to view it in a web browser, you received an error. You’re going to fix that by using a S3 bucket policy that will allow all content in the bucket to be viewed publically. When an S3 bucket is created, the only person that is granted any permission to that bucket is the account that created it. You can see an example with the main grantee shown in Figure 4-1. This account has full permissions on the bucket and can read the contents of the bucket (list), write to the bucket (upload), delete objects in the bucket, view objects in the bucket (though not until the object is made public), and edit the properties of objects within the bucket.
A policy is a JSON-formatted document that can be applied to an AWS resource such as an S3 bucket to control access to that resource by defining actions, resources, and effects. Actions are predefined work that can be performed against a resource. For in-depth information about using S3 actions, AWS has a resource available at http://docs.aws.amazon.com/AmazonS3/latest/dev/using-with-s3-actions.html . An example of an action is the ability to list an S3 bucket’s contents. Resources are AWS resources and can be things like an IAM account or, in this case, an S3 bucket. An effect is the end result of the permission or control that you are looking to enforce, such as Allow or Deny. The policy that you will apply to your bucket is listed as follows (and is also included in the Chapter 4 sample code, named s3bucket_policy.json):
{
    "Version": "2012-10-17",
    "Statement": [
        {
            "Sid": "PublicReadForGetBucketObjects",
            "Effect": "Allow",
            "Principal": "*",
            "Action": "s3:GetObject",
            "Resource": "arn:aws:s3:::www.santihosting.com/*"
        }
    ]
}
To apply the bucket policy, select your bucket in S3 and view the bucket properties . From this page, drop down the Permissions tab and click the “Add bucket policy” button to open up the Bucket Policy Editor. In this dialog box, you will paste your edited text content from the JSON sample file. The result should look like Figure 4-2.
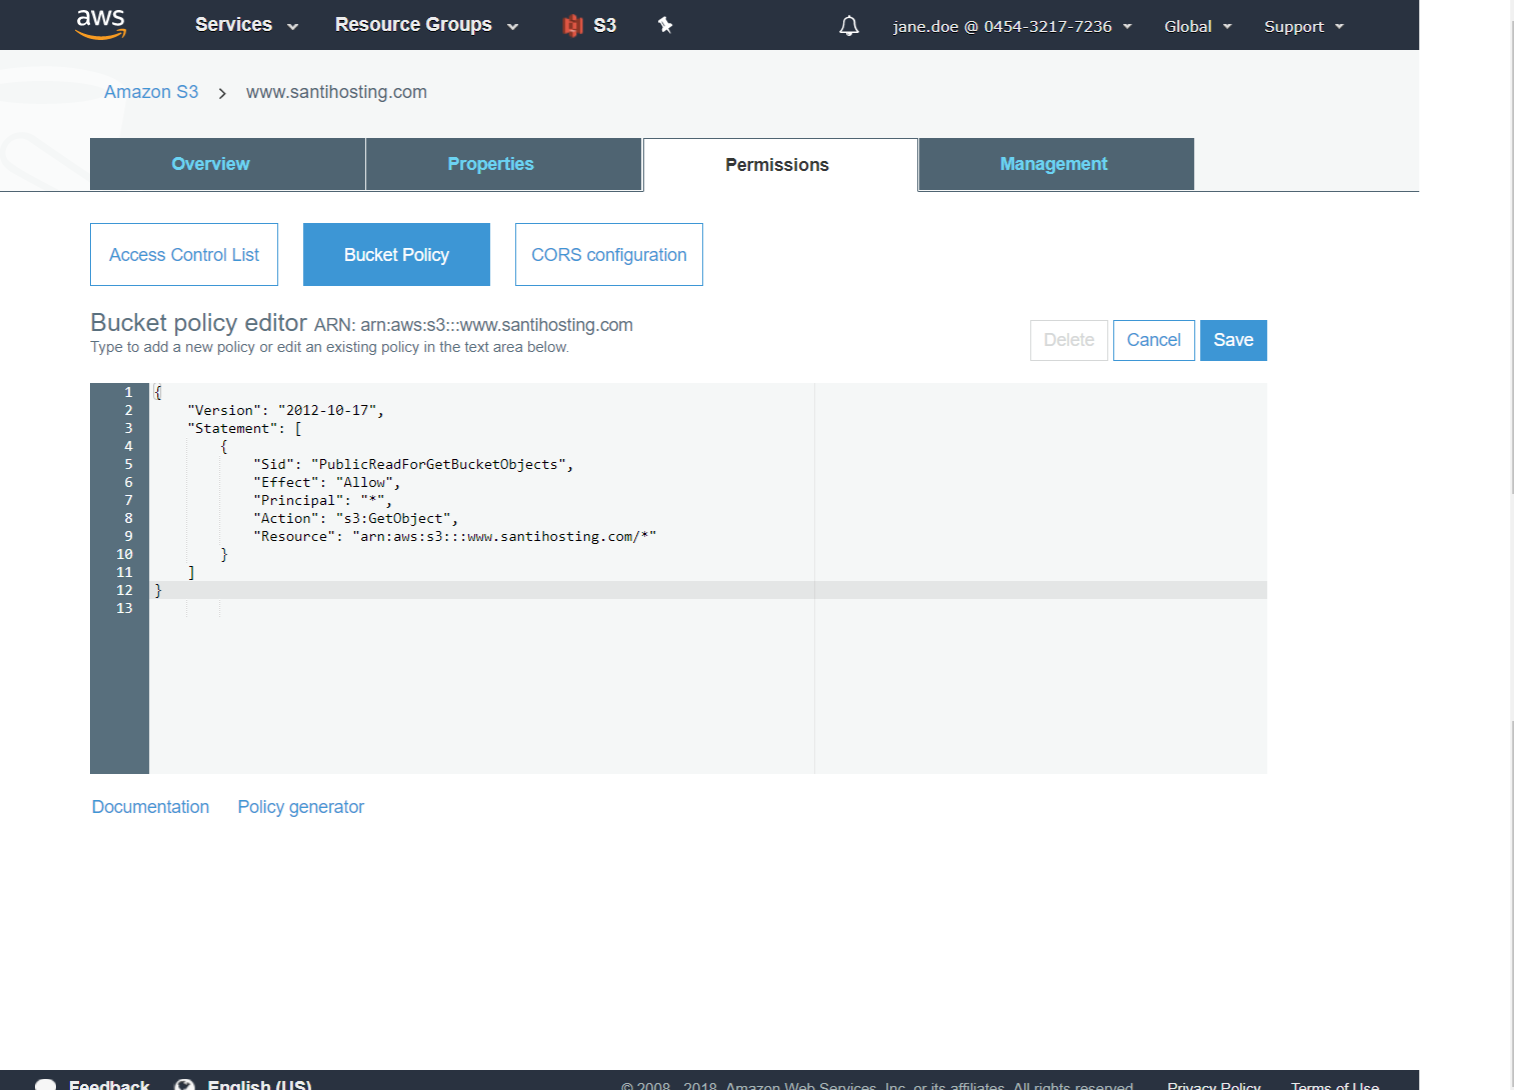
Once completed, click the Save button and your bucket policy will be applied. Applying this policy will mean that everyone can perform the Get Object method against any content in the www.santihosting.com S3 bucket. If you click your bucket name, explore your content, and choose the link, you should now be successful in accessing the object endpoint via a web browser and no longer receive the error message you experienced previously. Figure 4-3 shows one of the objects being accessed via the S3 object endpoint URL.

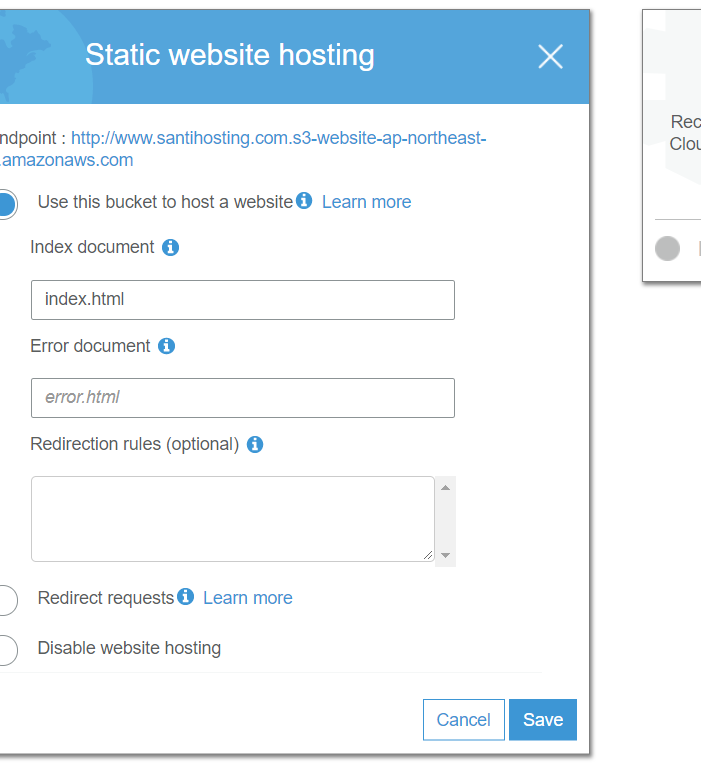
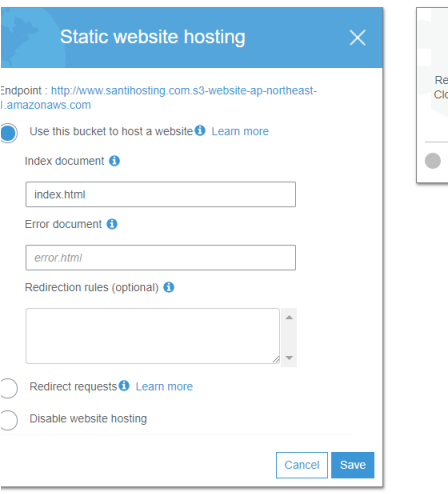
Enable Static website hosting and select radio button 1 with index.html as index document as figure 4-4 and save.
Now that you have enabled static website hosting on your S3 bucket you can open a web browser and point to the S3 bucket endpoint domain name listed in that section on the S3 bucket’s Properties page. The URL is shown in Figure 4-5; it has the bold text “Endpoint” in front of it.
When you register a domain name, AWS creates a hosted zone for that domain and populates it with two types of DNS records (also known as record sets in AWS Route53 terminology).
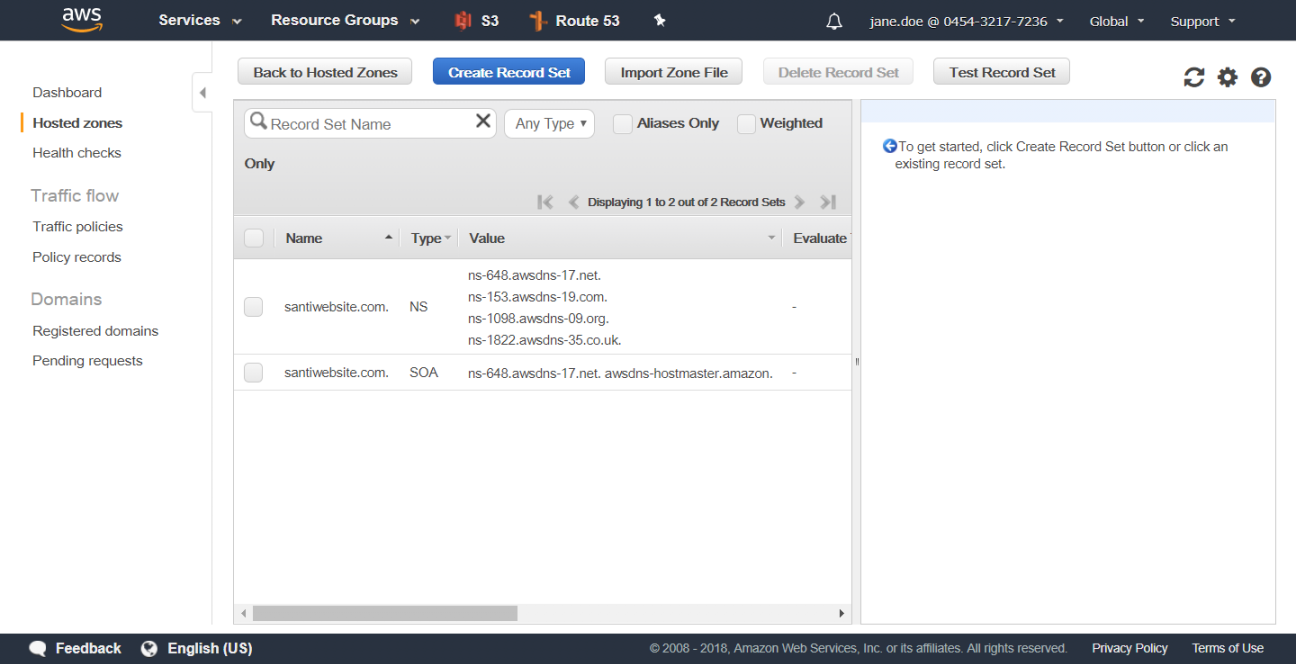
Route53 allows for the use of what is referred to as an alias record to point to AWS-specific resource endpoints such as elastic load balancers, CloudFront distributions, or S3 static website content.
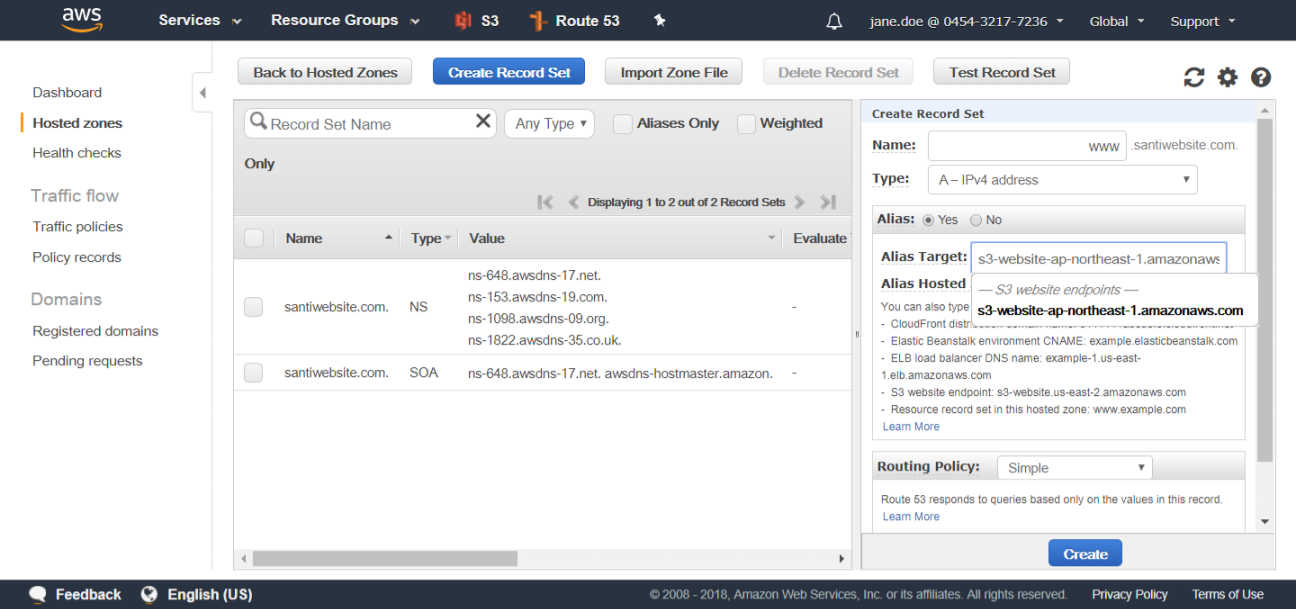
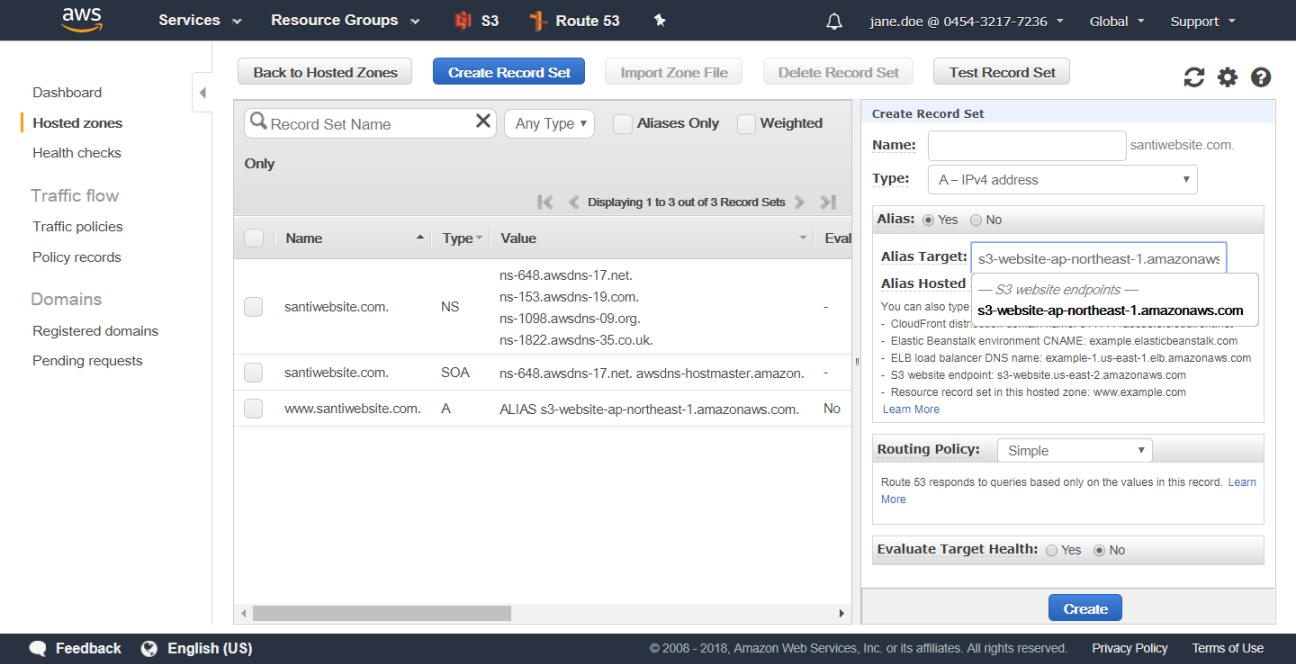
From within the Route53 Dashboard, choose the Hosted Zones link from the left-hand navigation menu. Once presented with the list of hosted zones, select the one that you want to add DNS record sets to; for this example, choose the santiwebsite.com hosted zone. By default, there are currently only two record sets listed in your hosted zone, as previously illustrated in Figure 4-17.To create a new record set in this hosted zone, click the Create Record Set button at the top of the screen. An input area will display to the right of the screen and will collect details about the record set to be created, as previously illustrated in Figure 4-24.You must first create a record set to handle the “www” sub-domain. You will need to have your S3 static website endpoint handy because you will be entering this as the alias value for your record. As you may recall, in your example, the website endpoint is found in the S3 Bucket Properties window and in your case is formatted as santiwebsite.com.s3-website-ap-northeast-1.amazonaws.com. You will enter www in the Name input box, leave the A - IPv4 Address default type of record set, and then click the Yes radio button for the Alias option. Once selected, you can then enter your alias target into the input box; this will be the value of your S3 website endpoint noted above.
What about those that enter the domain name without the www sub-domain? Those visitors will be greeted with a DNS error. To address this, perform the following steps:
Go to services and select Route 53